Use a Byproduct from Prepping Dirty Produce to Give Your Soil a HUGE Boost: Permaculture Diary9/1/2023
Nothing is wasted. Capturing and storing energy. These are a couple of the permaculture principles I’m employing by soaking my carrots in water for 12 hours before processing, and then reclaiming that micro-organism filled water for my garden and compost heap.
Right after harvesting carrots and other root crops, it’s essential to remove the greens. Otherwise they’ll continue to pull water from the root. This can leave your carrot, turnip, or radish for example, wilted if it had to keep supplying the green tips with hydration. To restore any lost water and to loosen dirt and debris on the outside of the vegetable, I soak my carrots for 8-12 hours post harvest, after the greens have been removed. The next day, when I’m processing the carrots, I’m left with water that contains all the soil from my garden. That garden soil was created using a mix of growing soil, compost, and organic matter I’ve built up over time. By allowing it to soak in the water and breathe overnight, micro bacteria in that soil begins to multiply. Essentially, we’re creating compost tea from the soil deposits on the outside of the crops. This nutrient dense liquid can be applied to the garden directly. Instead I prefer to add mine to my compost heap. Scraps from vegetable processing are a great compost additive —but liquid compost is even better since it’s full of helpful microbes.
If you're new to this space, I’m Angela. The best visual I can think of to illustrate what I’m trying to build is a small farm in France called La Ferme du Bec Hellouin. This is what I’m trying to create in central New Jersey: a thriving homestead resilient to climate change using permaculture methods.
I’m not your typical homesteader. I’m using animals and cover crops to restore once-depleted and dead soil. I place great priority on planting perennial crops and overstory trees. I invite wildlife into our farm ecosystem where nature is at the forefront of every decision. And every animal has at least one job that contributes to our ecosystem. As a result we are thriving despite heavy wildfire smoke, flooding, and drought. My homestead was build in 1775, but it’s only been under my direction for about 8 years. Already we have seen an increase in beneficial insects, birds, butterflies and wildlife. All while growing enough food for our family. I hope you’ll stick around. For more information on Le Ferme du Bec Hellouin, please click here. You can also find their book, Miraculous Abundance, here. Cover crops get a lot of hype when it comes to the vegetable garden. But they’re just as important (if not more so) in animal grazing spaces. My pastures are no longer seeded with straight grass—instead I use a mix of hand-selected cover crops.
I researched cover crops that meet the nutritional needs of my animal species while giving back to the soil. Cover crops not only create organic matter and improve soil, they also can attract beneficial insects, suppress weeds, bring up plant available nitrogen, phosphorus, and potassium to plant roots, improve soil compaction, and more. My book, The Sustainable Homestead, has lots of info on cover crops and pasture management. The Rodale Institute is an incredible resource for finding suitable forage crops for your exact species and soil goals. Here's the thing about dill pickles... They can be canned with lots of room for creativity so long as the vinegar to water ratios remain the same. The vinegar is the ingredient that contributes acid to the recipe which is an essential component of safe water bath canning. Water bath canning is the best method for dill pickles for long term shelf storage; while you absolutely could pressure can, the result would be a mushy spear as a result of the high heat. A crunchy spear can still be hard to produce in water bath canning because, after all, we are cooking the spear in boiling water. While some folks like to add pickling granules (calcium chloride) to their canning jars to help maintain a crispy pickle, I go the natural route with grape leaves. Grape leaves contain tannins that naturally contribute to a crisp pickle and we have plenty on-hand from our hobby vineyard. One grape leaf at the bottom of the jar is all that's needed to help keep your pickles crunchy. 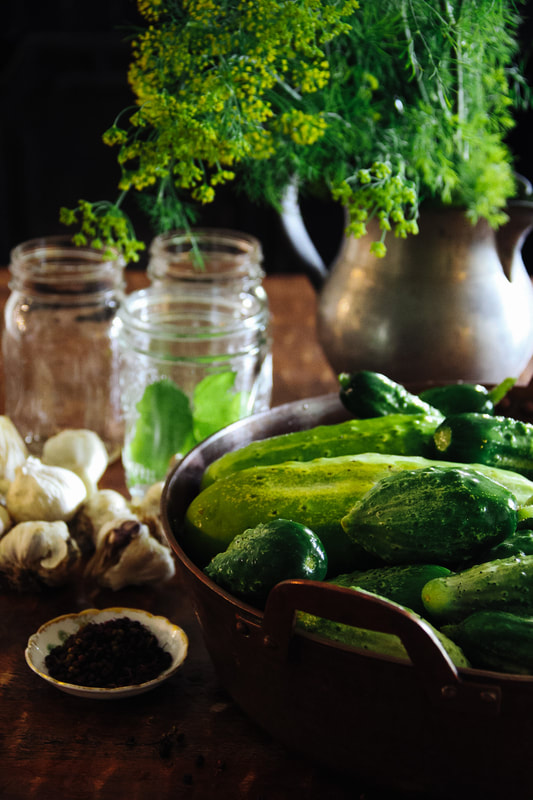 Angela's kosher dill pickle RECIPEYields 4 pint jars Ingredients 2.5 pounds pickling cucumbers (fresh, washed and free of blemishes) 2.5 cups non-chlorinated water 2.5 cups distilled white vinegar 1/4 cup + 1 teaspoon kosher salt 4 garlic cloves, peeled 4 grape leaves, washed and free of blemishes 12 fresh dill sprigs 2 teaspoons yellow mustard seed, whole 24 black peppercorns Directions Wash the cucumbers. Cut 1/4" off of the blossom end. Quarter or slice the cucumbers in half, lengthwise. Trim to fit the height of the jar while allowing 1/2" headspace. Combine water, vinegar, and kosher salt in a saucepan over medium heat. Bring to a boil and stir to dissolve the salt. Remove from heat. Sterilize the canning jars and prep the lids and rings. Start a large stockpot or canning pot of water on the stove. Bring to a boil. While the water is heating, begin to fill the jars. Place one grape leaf, three sprigs of dill, one garlic clove, 1/2 teaspoon mustard seed, and six peppercorns in each jar. Pack tightly with sliced cucumbers. Repeat until all jars are packed. 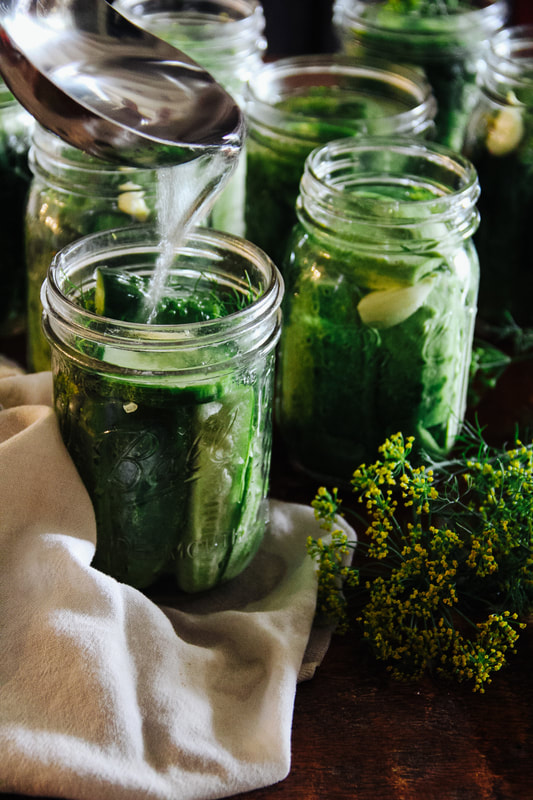 Pour the vinegar, water and salt brine into each jar, covering the contents. Leave 1/2" of headspace at the top of each jar. Remove air bubbles by running a clean butter knife around the inner perimeter of the jar. Wipe the rim of each jar clean with a dry towel. Add the lid and rim and tighten.
Submerge the jars in the boiling water bath and process for 15 minutes, adjusting for your altitude as needed. You can find altitude adjustments on Ball canning's website. After 15 minutes remove the jars from the water bath and set aside on a folded dish towel on the countertop. Allow to cool. Lids will pop as they seal. After the jars have fully cooled, check the center of each jar lid by pressing with your finger. If the lid fluctuates, reprocess for another 15 minutes. If the lid is firm, the seal is successful. Store in a cool, dark place. Pickles should be consumed within one year. It’s high spring and join me in harvesting peas, strawberries, and broccoli this evening during golden hour. I’ll share some permaculture tips as we go and a story about how I almost died from an allergic reaction to pesticides. A hyperactive immune response caused me to go into anaphylactic shock... for weeks. Yes I homestead today because I believe it's better for the environment and I crave a personal relationship with the land. But I also do it out of necessity; growing my own food and preparing it in the kitchen is essential for my health. I started keeping goldfish in my water trough about four years ago. I currently have the same four fish who started out as quite small 9¢ in my 100-gallon stock tank, and another two goldfish in my 35-gallon sheep stock tank. The fish overwinter well in the troughs, especially because they have the added comfort of a submerged trough heater in the winter time. The fish require no supplemental feed; they eat the mosquito larvae on the top of the water, and also eat the bits of hay and forage that fall from the horses' mouths when they drink.
Because my Clydesales are so large and require 35 gallons of water each per day, and I also have five sheep to one 35-gallon tank, I'm refilling water troughs constantly. The continuous refilling generates clean water full of bubbles--and the animals only add more as they play with their water before they drink. The fish get the aeration they need, the food they require, and a large tank for swimming all while keeping our mosquito population down. Do the horses ever eat the fish? No--they swim to the bottom when the horses approach. Do any other animals or birds of prey hunt the fish? Nope--not once here on our farm. How do I know they're healthy and thriving? My vet friend says as long as they're eating, creating manure, growing, and swimming they're doing great. 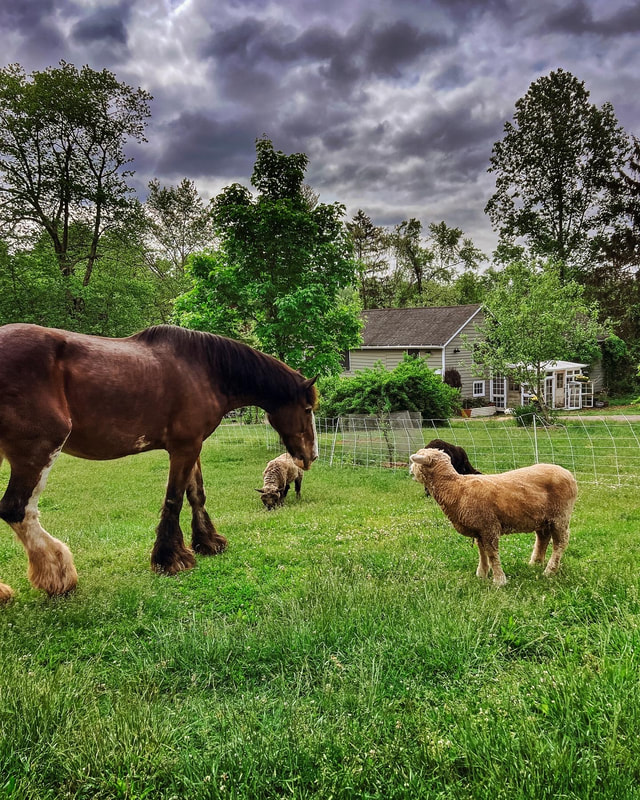 I rotationally graze my animals here at the homestead. Sheep ingest many parasites when they graze that affect horses, and the parasites are killed because they’re not ingested by the desired host. The horses do the same for the sheep. All the while, different nutrients are added to the soil through manure. 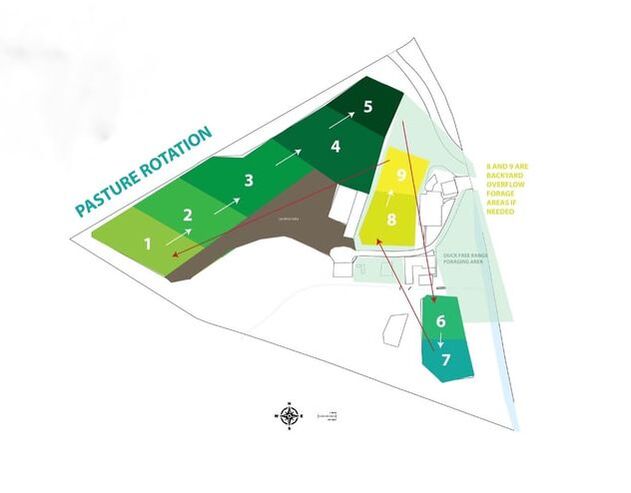 Most often, the sheep follow the horses. You can see my rotation plan I put together when I was in school in the second slide. In these shots, however, the horses and sheep are lumped together, tandem grazing the backyard. My recent travels affected my pasture schedule so we’re using the backyard as a buffer while it all comes back in. Animals are introduced to a space when forage grasses reach 8-10” high, and forage legumes reach 10-12”. All animals are pulled from a space and it’s allowed to rest at 4”. Anything under that is considered over-grazed, and grows back much more slowly.  Angela and Elaine invite you to join them in their kitchens for a zoom ‘Bakealong’. Join them as they make the stuffed sourdough pizza rolls from Elaine’s new book, Easy Everyday Sourdough Bread Baking. Perfect for children to join in too!
Date: Saturday, 1st July Time: 10am US/3pm UK Prior to the event you will receive:
Make, bake and learn from Angela and Elaine. They look forward to welcoming you into their kitchens! Timing: 60-90 mins. *The recipe is for a sourdough based dough; if you are not yet a sourdough baker and would like to join in, please feel free to make a yeasted dough in readiness. Bios: Angela Ferraro-Fanning is a permaculture homesteader in central New Jersey. She believes in regenerative homesteading practices that mimic patterns in nature. The six-acre historic farm is home to Clydesdale horses, honeybees, sheep, ducks, geese, guinea fowl, a small orchard, hobby vineyard, and food forest gardens. Angela is the author of several books including The Little Homesteader series, The Harvest Table Cookbook, and The Sustainable Homestead. She also co-hosts a podcast called HOMESTEADucation. Web: Axeandroothomestead.com IG, TikTok: @AxeAndRootHomestead YouTube: Axe And Root Homestead Elaine from Foodbod Sourdough, is a sourdough baker, cookbook writer and teacher, but mostly a sourdough ‘simplifier’. Dverything Elaine does and shares is to show how truly simply sourdough can be. Elaine removes the complication and unnecessary steps, and often the fear, that can come with making sourdough, and shows bakers all over the world how they can easily make their own healthy, tasty bread, week in, week out, in their home kitchens, to suit their lifestyle and timings. Elaine also hosts a podcast all about food, The Foodbod Pod. Website: https://foodbodsourdough.com/ Instagram: https://www.instagram.com/elaine_foodbod/ Facebook: https://www.facebook.com/foodbodsourdough YouTube: https://www.youtube.com/c/foodbodSourdough A new experimental side project called Diary of a Homesteader. Authentic conversations about daily life on the farm. True stories that reflect the good, bad, and in between. In this first episode, I'm sharing the trust issues I'm currently having after an incident at the farm.
|
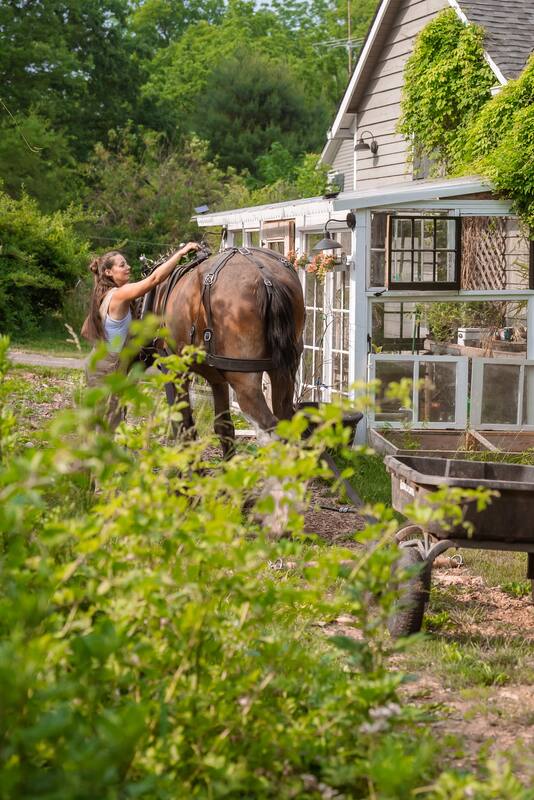
Angela is the farmer and content creator behind Axe & Root Homestead® LLC. This historic six-acre permaculture farm is home to two Clydesdale horses, ten honeybee hives, five sheep, two guardian dogs, barn cats and a flock of 40 geese and ducks. The farm produces maple syrup, fruit from a small orchard and loads of garden produce for consumption, preservation and donation to the local food pantry.
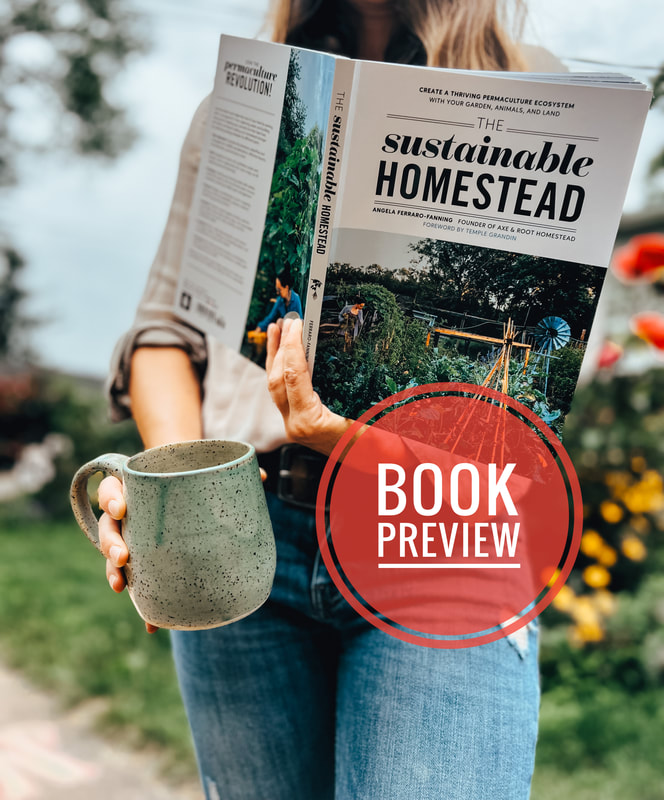
The Sustainable Homestead is available NOW!
Categories
All
|