 I grow lots of blossoms alongside my food crops. Rather than segregate food and flowers, they’re woven together. I use herbs and flowers often as companions interplanted with my food (you can find many posts in the "permaculture" and "growing" categories based on companion plant benefits and specifics). But in this post, I wanted to talk about my approach or method of gardening which is my "layered permaculture garden method." I call it a layering method because I sow calendula, for example, in the spring alongside veggies. As the first layer of veggies reach maturity, the second layer (the calendula) is still small but supporting the food crops. By the time spring veggies are spent and done, the second layer of flowers reaches full height. The second layer shrouds any gaps from the first layer, protecting the soil. This means I often plant veggies and herbs first and wait a week or two before adding in some flower varieties to fill gaps in the spring. This ensures the growth rate of the flowers doesn’t crowd out and suppress food crops.   As for layering a third and fourth planting, I absolutely do this come mid-summer. When I'm ready to plant for fall harvests in mid-July through August, crops like beets, carrots, fennel, greens, kale, broccoli, and other brassicas are inserted amongst the flowers. The permaculture benefit of planting seedlings this way is huge. Often the scent of many flowering herbs like oregano, lavender, nasturtium, basil, etc., is enough to deter cabbage moths and other pests. Conversely, beneficial insects are attracted to the blooms surrounding the crops, which increases pollination of veggie blossoms. Parasitic wasps are drawn to the garden and prey on any "bad bugs" loitering within. This leaves my new veggies protected while they grow. Cold loving flowers like calendula can be seeded as a fourth layer a few weeks after the third layer is planted.
As for the flowers that I choose, I go for self-seeding annuals for less work, like nigella, borage, chamomile and calendula. I heavily use perennials like lavender, non-invasive tansy, sterile comfrey, verbascum, speedwell, coneflower, foxglove, daisies, yarrow, rudbeckia, anemone, and roses to name a few. The benefits of perennials are many to the overall homestead ecosystem including increased carbon absorption by way of their woody plant tissues, their deep root networks which increase soil fertility, the fact that you don't have to replant them each year, the concept of them coming back and bigger and more full each season, and the many uses most of these perennials provide from edible rose petals to medicinal yarrow.  Let’s talk about another permaculture powerhouse plant that’s actually in the same family as comfrey. It’s borage and, hopefully, after reading below, you’ll add it to your growing space too. :)
There are said to be loads of medicinal benefits of BORAGE. If you’re into the home apothecary, this may help an excellent plant to research.   In Italy, a common menu item is Potato Pizza. While it may be an unusual topping choice in the United States, it's so delicious. I've broken up the carb fest by adding zucchini slices, shallots, and nothing more than rosemary, salt and pepper. This is a "white pizza" or a sauceless pie. Olive oil and an optional drizzle of balsamic reduction are all that's needed. This recipe is perfect for outdoor summer grilling when it's too hot to cook indoors, though I've included oven baking instructions also. Serve as a dinner or as an appetizer to a larger group.
FOR THE CRUST 1 + 1/3 cup water, room temperature 2 teaspoons active dry yeast 3 + 1/4 cups all purpose flour 1/2 teaspoon salt FOR THE TOPPINGS 4 large fingerling potatoes (or new spring small potatoes), washed and dried 3 cups water 1 teaspoon salt 1 zucchini 1 shallot, thinly sliced Olive oil for drizzling Dried rosemary to taste (I use about one tablespoon) Salt and pepper Balsamic reduction for drizzling (optional) Parmigiano Reggiano cheese, shredded (optional) Directions In a large mixing bowl combine the water and yeast. Stir with a fork and allow to sit undisturbed for 10 minutes. Add the flour and salt and stir to combine until a shaggy dough forms. Cover with a towel and rise 30 minutes. Meanwhile prep the toppings. Using a mandolin slicer or the slicing side of a box grater, thinly slice the potatoes. Place the potato slices in a small bowl with the water and one teaspoon of salt. Mix well. Allow the potatoes to soak. Thinly slice the zucchini using the mandolin or box grater and set aside. Take the pizza dough out of the bowl and turn out onto a floured work surface. Quickly knead until a smooth dough is formed. Divide the dough into two equal portions for a thick crust pizza, or four sections for a cracker crust. If grilling your pizza, heat the grill now. If baking, heat the oven to 425°F. On a piece of parchment paper sprinkled with flour, roll out one section of dough to your desired thickness. Keep in mind the size of the grill grates or your baking oven to ensure it fits. Repeat rolling out your remaining crusts on their own parchment paper sheets. Drizzle olive oil over each of the crusts and spread around evenly with a pastry brush or your hand. Drain the potatoes from their soaking water. Place the potato slices into a mixing bowl along with the zucchini slices, shallot, dried rosemary, and desired amount of salt and pepper. Gently stir to coat the vegetables. Carefully top the crusts of your pizzas with the potato and zucchini mixture. Try to form an even layer from edge to edge. Using a pizza peel or flat cooking sheet, transfer the pizza with the parchment paper into the oven or onto the grill. COOKING ON THE GRILL If grilling, turn the heat down to medium and close the lid. The parchment paper may char a bit—not to worry. Check after four minutes and continue to cook if a darker crust is desired. Check often. When the crust is finished, pull the pizza. If your vegetables are not darkened to your liking, pop the pizza in the oven under a broiler until golden brown. Remove and drizzle with balsamic reduction and cheese if you like! COOKING IN THE OVEN Bake the pizza for 10 minutes. The parchment paper may char a bit—not to worry. Check your pizza. If a darker crust or vegetables are desired continue to cook. Remove and drizzle with balsamic reduction and cheese if you like!  Graze on Fallen Fruit: How and Why to Pick up Fallen Apples/Pears During the Growing Season7/12/2024
There are three main reasons to pick up fallen fruit: 1. To break pest life cycles; 2. To reduce soil-retained diseases; 3. To deter an influx of wasps and stinging insects. Rather than pick up fallen fruit by hand, animals can be used to graze fallen fruit. This food-source is a means of nutrition for the animal, reduces work for the farmer, and allows the soil to gain fertilizer from droppings.  When looking for companion plants for my vegetable growing spaces or for my fruit tree guilds, I always look first to plants that have stacked functions. Multipurpose plants can bring more than one benefit to a growing space. Common permaculture plants favored for their multiple benefits include Sunchokes (aka Jerusalem Artichokes), Comfrey, and Elderberry. Another incredible companion, which I turn to often, is Yarrow. Common Yarrow is prevalent throughout the six-acres of my farm. I've allowed wild clusters to accumulate in my food forests, have split and planted them in my guilds, and have started bringing in various colors for visual diversity. But it's not just the aesthetics that are pleasing--yarrow is loaded with function for any growing space:
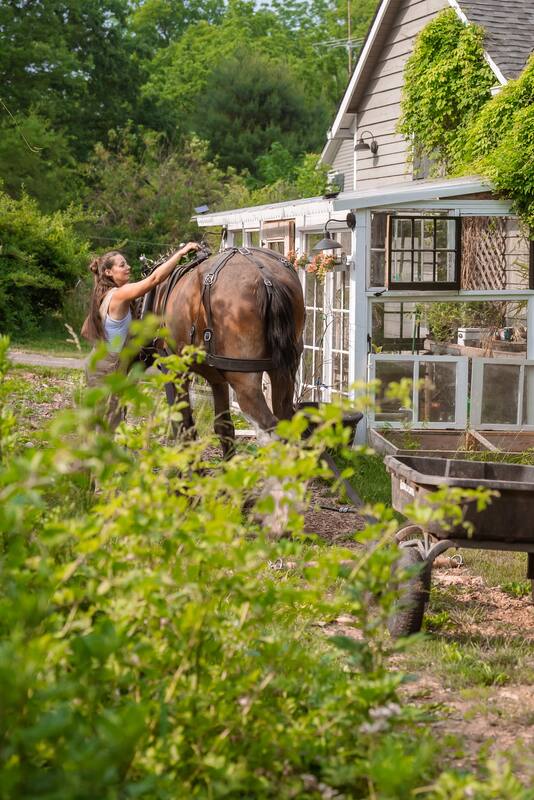
This incredible plant is native to much of the United States which means it's likely already hardy and well-adapted to your microclimate, serves the local ecosystem, and will not displace nor eradicate local plantings.  That MidAtlantic humidity is high lately, making it feel like you’re wrapping yourself in a warm wet blanket when you step outside. Despite all the sauna vibes, I have a routine down for the animals to keep them as comfortable as possible. But before we dive into the list, I think it's worth mentioning that choosing the RIGHT animals for your homestead climate is so important for successfully navigating the seasons. Animal breeds vary greatly and some may be better suited to specific weather patterns and climates than others. Clydesdales, for example, are native to a wet region of the world--same as my climate here in New Jersey. Cold hardy duck breeds (like Cayuga) handle our winters better than those suited to warmer regions of the world. Before comfortably comes into play, I think there's a lot to be said for animal breed-homestead compatibility to begin with. Now, without further ado, here's just a quick bulleted list of the efforts I make to keep everyone comfortable in extreme heat situations here on the farm. HORSES
THE FLOCK
THE SHEEP
THE LIVESTOCK GUARDIAN DOGS
 When I had the privilege of living in Switzerland for a moment in my 20s, we spent our weekends traveling to different parts of Europe. I was able to experience so many amazing cultures--and their food! And one dish that stands out to me especially is the paella we had in Spain. Paella is often prepared with meat or seafood. However, this vegetarian version is a showcase for all that the summer garden has to offer. Depending on your location, your harvests may look much different than mine. Feel free to substitute any/all of the vegetables listed below depending on your climate, season, or preferences. This simple recipe is how I make my own version of this Spanish entree, where only a few spices are needed to truly highlight the flavors of the garden. Ingredients 3 tablespoons olive oil 2 carrots, peeled and diced 1 shallot, minced 3 cloves garlic, minced 2 cups paella or short grain brown rice 2 teaspoons smoked paprika Saffron threads to taste (start with 1/2 teaspoon if you're unsure) 1 zucchini, diced 1 cup fresh peas (or thawed if using frozen) 1 cup water 1/2 cup chopped red bell pepper 1/2 cup chopped green bell pepper 1/2 cup chopped tomatoes 5 radishes, chopped 3 cups vegetable broth Fresh basil, sliced or shredded 1 lemon, sliced into 1/4" rounds salt and pepper to taste Directions 1. Heat the oven to 300F. Begin the paella by heating the olive oil in a large, wide, oven-safe skillet or paella pan over medium-high heat (9" around or wider). This recipe is all about surface area to get that signature paella crunchy rice-bottom. Add the carrots and cook for 2 minutes. 2. Add the shallot and cook one minute more. Next add the minced garlic and cook for 30 seconds to ensure it doesn't burn. Stir in the rice. 3. Cook the rice until translucent, about 4 minutes. Be sure the rice mixture does not burn. Add the smoked paprika and saffron threads. Stir to combine well. 4. Pour in the cup of water along with the zucchini, peas, chopped peppers, tomatoes, and radish. Mix well and allow to cook for 2 minutes. 5. Add three cups of vegetable broth to the pot and stir well. Now we allow the paella to cook undisturbed for 15 minutes. The rice mixture should be simmering, not boiling, and definitely not burning. 6. After 15 minutes, top the rice with the lemon slices. Transfer the unstirred rice skillet into the oven. Cook for another 12 minutes. 7. Remove the paella from the oven. Carefully check the bottom of the pot with a spoon to test the crunchiness of the bottom layer. If more crunch is desired, heat the paella over the stovetop burner on medium-high heat for one minute more. 8. Serve the paella family style, topped with shredded basil, and optional salt and pepper to taste.  You may already be aware that hard-neck garlic actually provides the grower with not one, but two harvests. The first comes earlier in the summer, several weeks before the garlic bulbs are ready to be harvested. A curlicue stem with a closed flower bud rises from the leaves here in central New Jersey in early-mid June. This is called the "scape." Removal of the scape or flower bud encourages the garlic plant to focus its energy and resources on the root bulb, rather than entering its reproductive cycle via the flower. Several weeks later, the garlic bulbs are pulled from the soil, providing the farmer with the second and final harvest. It's worth noting that soft-neck garlic varieties do not produce scapes. I'll admit that I'm not very good at using my scapes in the kitchen. Often I donate them to the food pantry or sell them at our farm stand. Though they have a strong garlic flavor, I often still have plenty of bulbs left over from last year's harvest to use up in kitchen recipes. But this year, I decided to eat them myself and make pesto. This pesto recipe is very garlic-forward. Typically the main characters in pesto are spinach and basil, while garlic simply plays a supporting role. This is not the case in this recipe. This spicy, savory, zesty use of scapes is purely for garlic lovers only. Use this pesto sauce on pizza, pasta, sandwiches or paninis, as a vegetable or cracker dip, or to coat potatoes with before roasting. I have tried them all and it's delicious!
Notes on Storage Freezing This recipe makes almost roughly six cups of pesto sauce. Since pesto sauce can not safely be canned via the water bath or pressure canning methods, I turn to freezing mine. If you are freezing in pint-sized mason jars, make sure they are wide-mouth. Fill the jars no more than 3/4 of the way full. Freeze the product WITHOUT THE LID ON and then, when the sauce is fully frozen, add the lid. This reduces air and pressure fluctuation, decreasing the chances of a cracked mason jar. Refrigerator You can also store the pesto sauce in the refrigerator for use over the next couple of days. Pesto Sauce Ingredients 6 cups roughly chopped garlic scapes 2/3 cup lemon juice 1 + 1/3 cup olive oil 2 cups water + more to thin as desired Handful of fresh basil leaves (don't get hung up on exact quantities; add to liking) 1/2 cup grated parmesan (omit for vegan) Optional: For a nuttier flavor, add 1/2 cup of sliced almonds Salt + pepper to taste Directions Combine all of the ingredients in a high-powered blender. Blend the contents until a sauce consistency has formed. There should be no large lumps. More water may be added to your liking to thin the sauce to your desired consistency. This is especially the case if adding optional almonds. Once blended use the sauce in your favorite pasta or pizza recipe, as a spread on sandwiches or paninis, or as a simple dip for veggies and crackers. Save any leftovers according to the notes listed above.  Oh. My. God. These cherries are one of those new favorite foods of mine, where I think, “Where have these been all my life?” I enjoy the homemade so much more than store bought. Luxardo Cherries are traditionally dark cherries soaked in Luxardo Liqueur used to garnish cocktails like a maraschino. You can use any cherry you choose (I use red Queen Ann cherries from my trees). Note that the syrup in this recipe is not as thick as there’s no fake corn syrup added here. The taste is a perfect blend of all my favorite Sicilian flavors; anise, cinnamon, and citrus. And of course, cherries. Ingredients 1 pound cherries, destemmed (pitting optional) 1 cup water 1 cup sugar 5 black peppercorns 1 star anise 1 cinnamon stick 1 lemon (peels only) 1 cup Luxardo liqueur Directions Wash and destem the cherries. Pitting is optional though I personally leave them in, otherwise they get eaten too quickly (ask me how I know that). :) Bring the water and sugar to a simmer in a large saucepot, stirring to dissolve. Add the peppercorns, anise, cinnamon, and lemon peels. Allow to gently simmer for about five minutes. Remove the syrup from the heat and add in the Luxardo liqueur. Stir to combine and then add the cherries. Make sure the cherries are evenly coated. Allow to soak in the syrup as they cool.  WATER BATH CANNING The cherries can be hotpacked into pint-sized mason jars. Simply fill the jars with the hot cherries leaving 1/2” headspace. Add the syrup in each jar to coat the cherries up to 1/4” headspace and can for 15 minutes. Store the processed jars in a cool dry area until using. Refrigerate after opening. REFRIGERATE If not canning, simply pack the cherries and syrup in a mason jar and store in the refrigerator. Discard after one month if not eaten.  The top portion of my property is fully exposed and a lot of wind blows through the pasture. I currently have semi-dwarf apple trees and peach trees along this top edge with their guild members, but I think a wind barrier is needed. This windbreak will help protect the fruiting trees that already reside here PLUS it'll make the birds more comfortable in their pasture throughout the winter.
SERVICEBERRIES I'm choosing serviceberries for their ability to withstand wind and wide range of water and soil conditions. They provide edible berries that are beneficial to humans and both birds and wildlife. They have the ability to grow thickly and quickly. HONEYBERRIES I'm also adding honeyberries. Honeyberries are incredibly nutrient-dense with loads of antioxidants. They, too, thrive in a wide range of soil conditions especially if there's good drainage. Doubling up on plantings means more of a windbarrier, more privacy, and more food. Perennial plantings offer a home to birds and predatory insects who I would like to retain year-round, as they keep pest populations under control in our growing spaces. GOPHER CAGING: https://www.amazon.com/shop/axeandroo... CROP CLOCHES: https://www.amazon.com/shop/axeandroo... Check out Les Fermes du Bec Hellouin: https://www.fermedubec.com/english/ |
Angela is the farmer and content creator behind Axe & Root Homestead® LLC. This historic six-acre permaculture farm is home to two Clydesdale horses, ten honeybee hives, five sheep, two guardian dogs, barn cats and a flock of 40 geese and ducks. The farm produces maple syrup, fruit from a small orchard and loads of garden produce for consumption, preservation and donation to the local food pantry.
The Sustainable Homestead is available NOW!
Categories
All
|


