 In Italy, a common menu item is Potato Pizza. While it may be an unusual topping choice in the United States, it's so delicious. I've broken up the carb fest by adding zucchini slices, shallots, and nothing more than rosemary, salt and pepper. This is a "white pizza" or a sauceless pie. Olive oil and an optional drizzle of balsamic reduction are all that's needed. This recipe is perfect for outdoor summer grilling when it's too hot to cook indoors, though I've included oven baking instructions also. Serve as a dinner or as an appetizer to a larger group.
FOR THE CRUST 1 + 1/3 cup water, room temperature 2 teaspoons active dry yeast 3 + 1/4 cups all purpose flour 1/2 teaspoon salt FOR THE TOPPINGS 4 large fingerling potatoes (or new spring small potatoes), washed and dried 3 cups water 1 teaspoon salt 1 zucchini 1 shallot, thinly sliced Olive oil for drizzling Dried rosemary to taste (I use about one tablespoon) Salt and pepper Balsamic reduction for drizzling (optional) Parmigiano Reggiano cheese, shredded (optional) Directions In a large mixing bowl combine the water and yeast. Stir with a fork and allow to sit undisturbed for 10 minutes. Add the flour and salt and stir to combine until a shaggy dough forms. Cover with a towel and rise 30 minutes. Meanwhile prep the toppings. Using a mandolin slicer or the slicing side of a box grater, thinly slice the potatoes. Place the potato slices in a small bowl with the water and one teaspoon of salt. Mix well. Allow the potatoes to soak. Thinly slice the zucchini using the mandolin or box grater and set aside. Take the pizza dough out of the bowl and turn out onto a floured work surface. Quickly knead until a smooth dough is formed. Divide the dough into two equal portions for a thick crust pizza, or four sections for a cracker crust. If grilling your pizza, heat the grill now. If baking, heat the oven to 425°F. On a piece of parchment paper sprinkled with flour, roll out one section of dough to your desired thickness. Keep in mind the size of the grill grates or your baking oven to ensure it fits. Repeat rolling out your remaining crusts on their own parchment paper sheets. Drizzle olive oil over each of the crusts and spread around evenly with a pastry brush or your hand. Drain the potatoes from their soaking water. Place the potato slices into a mixing bowl along with the zucchini slices, shallot, dried rosemary, and desired amount of salt and pepper. Gently stir to coat the vegetables. Carefully top the crusts of your pizzas with the potato and zucchini mixture. Try to form an even layer from edge to edge. Using a pizza peel or flat cooking sheet, transfer the pizza with the parchment paper into the oven or onto the grill. COOKING ON THE GRILL If grilling, turn the heat down to medium and close the lid. The parchment paper may char a bit—not to worry. Check after four minutes and continue to cook if a darker crust is desired. Check often. When the crust is finished, pull the pizza. If your vegetables are not darkened to your liking, pop the pizza in the oven under a broiler until golden brown. Remove and drizzle with balsamic reduction and cheese if you like! COOKING IN THE OVEN Bake the pizza for 10 minutes. The parchment paper may char a bit—not to worry. Check your pizza. If a darker crust or vegetables are desired continue to cook. Remove and drizzle with balsamic reduction and cheese if you like!   When I had the privilege of living in Switzerland for a moment in my 20s, we spent our weekends traveling to different parts of Europe. I was able to experience so many amazing cultures--and their food! And one dish that stands out to me especially is the paella we had in Spain. Paella is often prepared with meat or seafood. However, this vegetarian version is a showcase for all that the summer garden has to offer. Depending on your location, your harvests may look much different than mine. Feel free to substitute any/all of the vegetables listed below depending on your climate, season, or preferences. This simple recipe is how I make my own version of this Spanish entree, where only a few spices are needed to truly highlight the flavors of the garden. Ingredients 3 tablespoons olive oil 2 carrots, peeled and diced 1 shallot, minced 3 cloves garlic, minced 2 cups paella or short grain brown rice 2 teaspoons smoked paprika Saffron threads to taste (start with 1/2 teaspoon if you're unsure) 1 zucchini, diced 1 cup fresh peas (or thawed if using frozen) 1 cup water 1/2 cup chopped red bell pepper 1/2 cup chopped green bell pepper 1/2 cup chopped tomatoes 5 radishes, chopped 3 cups vegetable broth Fresh basil, sliced or shredded 1 lemon, sliced into 1/4" rounds salt and pepper to taste Directions 1. Heat the oven to 300F. Begin the paella by heating the olive oil in a large, wide, oven-safe skillet or paella pan over medium-high heat (9" around or wider). This recipe is all about surface area to get that signature paella crunchy rice-bottom. Add the carrots and cook for 2 minutes. 2. Add the shallot and cook one minute more. Next add the minced garlic and cook for 30 seconds to ensure it doesn't burn. Stir in the rice. 3. Cook the rice until translucent, about 4 minutes. Be sure the rice mixture does not burn. Add the smoked paprika and saffron threads. Stir to combine well. 4. Pour in the cup of water along with the zucchini, peas, chopped peppers, tomatoes, and radish. Mix well and allow to cook for 2 minutes. 5. Add three cups of vegetable broth to the pot and stir well. Now we allow the paella to cook undisturbed for 15 minutes. The rice mixture should be simmering, not boiling, and definitely not burning. 6. After 15 minutes, top the rice with the lemon slices. Transfer the unstirred rice skillet into the oven. Cook for another 12 minutes. 7. Remove the paella from the oven. Carefully check the bottom of the pot with a spoon to test the crunchiness of the bottom layer. If more crunch is desired, heat the paella over the stovetop burner on medium-high heat for one minute more. 8. Serve the paella family style, topped with shredded basil, and optional salt and pepper to taste.  You may already be aware that hard-neck garlic actually provides the grower with not one, but two harvests. The first comes earlier in the summer, several weeks before the garlic bulbs are ready to be harvested. A curlicue stem with a closed flower bud rises from the leaves here in central New Jersey in early-mid June. This is called the "scape." Removal of the scape or flower bud encourages the garlic plant to focus its energy and resources on the root bulb, rather than entering its reproductive cycle via the flower. Several weeks later, the garlic bulbs are pulled from the soil, providing the farmer with the second and final harvest. It's worth noting that soft-neck garlic varieties do not produce scapes. I'll admit that I'm not very good at using my scapes in the kitchen. Often I donate them to the food pantry or sell them at our farm stand. Though they have a strong garlic flavor, I often still have plenty of bulbs left over from last year's harvest to use up in kitchen recipes. But this year, I decided to eat them myself and make pesto. This pesto recipe is very garlic-forward. Typically the main characters in pesto are spinach and basil, while garlic simply plays a supporting role. This is not the case in this recipe. This spicy, savory, zesty use of scapes is purely for garlic lovers only. Use this pesto sauce on pizza, pasta, sandwiches or paninis, as a vegetable or cracker dip, or to coat potatoes with before roasting. I have tried them all and it's delicious!
Notes on Storage Freezing This recipe makes almost roughly six cups of pesto sauce. Since pesto sauce can not safely be canned via the water bath or pressure canning methods, I turn to freezing mine. If you are freezing in pint-sized mason jars, make sure they are wide-mouth. Fill the jars no more than 3/4 of the way full. Freeze the product WITHOUT THE LID ON and then, when the sauce is fully frozen, add the lid. This reduces air and pressure fluctuation, decreasing the chances of a cracked mason jar. Refrigerator You can also store the pesto sauce in the refrigerator for use over the next couple of days. Pesto Sauce Ingredients 6 cups roughly chopped garlic scapes 2/3 cup lemon juice 1 + 1/3 cup olive oil 2 cups water + more to thin as desired Handful of fresh basil leaves (don't get hung up on exact quantities; add to liking) 1/2 cup grated parmesan (omit for vegan) Optional: For a nuttier flavor, add 1/2 cup of sliced almonds Salt + pepper to taste Directions Combine all of the ingredients in a high-powered blender. Blend the contents until a sauce consistency has formed. There should be no large lumps. More water may be added to your liking to thin the sauce to your desired consistency. This is especially the case if adding optional almonds. Once blended use the sauce in your favorite pasta or pizza recipe, as a spread on sandwiches or paninis, or as a simple dip for veggies and crackers. Save any leftovers according to the notes listed above.  Oh. My. God. These cherries are one of those new favorite foods of mine, where I think, “Where have these been all my life?” I enjoy the homemade so much more than store bought. Luxardo Cherries are traditionally dark cherries soaked in Luxardo Liqueur used to garnish cocktails like a maraschino. You can use any cherry you choose (I use red Queen Ann cherries from my trees). Note that the syrup in this recipe is not as thick as there’s no fake corn syrup added here. The taste is a perfect blend of all my favorite Sicilian flavors; anise, cinnamon, and citrus. And of course, cherries. Ingredients 1 pound cherries, destemmed (pitting optional) 1 cup water 1 cup sugar 5 black peppercorns 1 star anise 1 cinnamon stick 1 lemon (peels only) 1 cup Luxardo liqueur Directions Wash and destem the cherries. Pitting is optional though I personally leave them in, otherwise they get eaten too quickly (ask me how I know that). :) Bring the water and sugar to a simmer in a large saucepot, stirring to dissolve. Add the peppercorns, anise, cinnamon, and lemon peels. Allow to gently simmer for about five minutes. Remove the syrup from the heat and add in the Luxardo liqueur. Stir to combine and then add the cherries. Make sure the cherries are evenly coated. Allow to soak in the syrup as they cool.  WATER BATH CANNING The cherries can be hotpacked into pint-sized mason jars. Simply fill the jars with the hot cherries leaving 1/2” headspace. Add the syrup in each jar to coat the cherries up to 1/4” headspace and can for 15 minutes. Store the processed jars in a cool dry area until using. Refrigerate after opening. REFRIGERATE If not canning, simply pack the cherries and syrup in a mason jar and store in the refrigerator. Discard after one month if not eaten.   I'm not really a holiday person (with the exception of Halloween...), but I do have favorite recipes I've created that are inspired by specific occasions. This one is super easy but looks fancy, and has been a crowd pleaser in our home for years. Plus it uses homegrown ingredients! This dessert is inspired by the raspberries I harvested from the garden and stored in my freezer (y0u can use strawberries too). I'm sharing my Raspberry Chocolate Boxes—just in time for Valentines Day! These are just like those little raspberry cream chocolates found in the heart-shaped boxes of chocolates, except the inside is CAKE made with homegrown raspberries and homemade applesauce. RASPBERRY CHOCOLATE BOXES Ingredients 2 cups fresh raspberries, washed (can use frozen but thawed) 1/4 cup water 1/3 cup butter (dairy or plant-based), softened 1/2 cup sugar 1/2 cup unsweetened applesauce 1 tsp vanilla extract 1/4 cup milk (dairy or plant-based) 1.25 cups flour, sifted 1 tsp baking powder 1/4 tsp baking soda 1/2 tsp salt For the Chocolate 6 tbsp butter (dairy or plant-based) 3 cups bittersweet chocolate chips Fresh raspberries to garnish, optional DIRECTIONS Heat oven to 350F. Make a purée by combining raspberries and 1/4 cup water in a blender. Blend until smooth. Beat sugar and butter on high for 2 minutes in a stand mixer. Add applesauce, vanilla and milk. Mix on low for 30 seconds. In a separate bowl, blend flour, baking powder, baking soda and salt. Mix well and then add to the wet ingredients in the stand mixer. Blend until just combined. Next add purée and stir but do not over-mix. Pour into a greased cake pan (I use an 8x8” square). Bake for 24-28 minutes or until done. Allow to cool completely. Turn cake out onto parchment paper. Slice the cake into 1x1”squares. In a double boiler or microwave safe bowl, melt 6 tablespoons butter and chocolate chips. Carefully dip cake squares into chocolate to coat. Set on parchment paper and repeat until all cake is dipped. Top each square with a fresh raspberry if desired. Place in the refrigerator and allow to chill to harden chocolate. Store in an airtight container for up to 4 days. 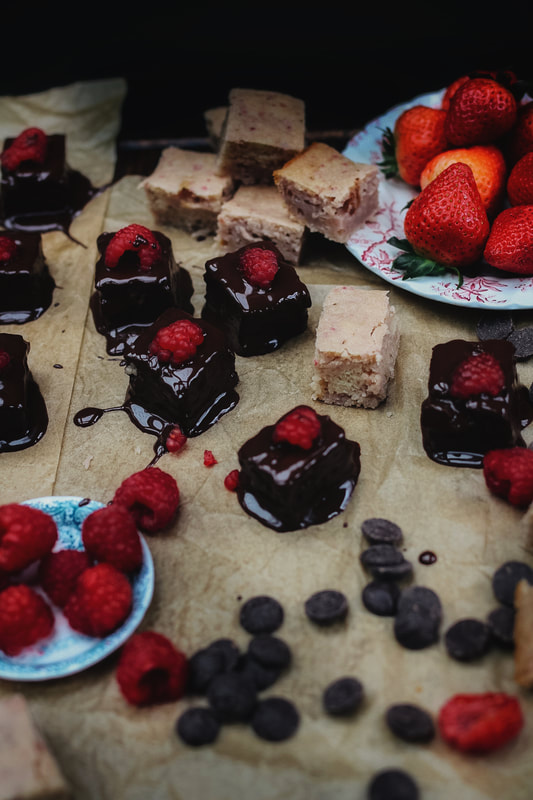  Sometimes you just need a good chili oil, am I right? This oil is extremely full flavored. It's not just olive oil mixed with a little kick. This is an all out flavor fest with ginger, shallot, garlic, cinnamon, pepper, anise, chilis (of course), and more. I use it for drizzling over tofu or stir fry dishes, for adding a burst of flavor to the top of whipped ricotta cheese dip, or for just plain dipping with good crusty bread. It's SO good. 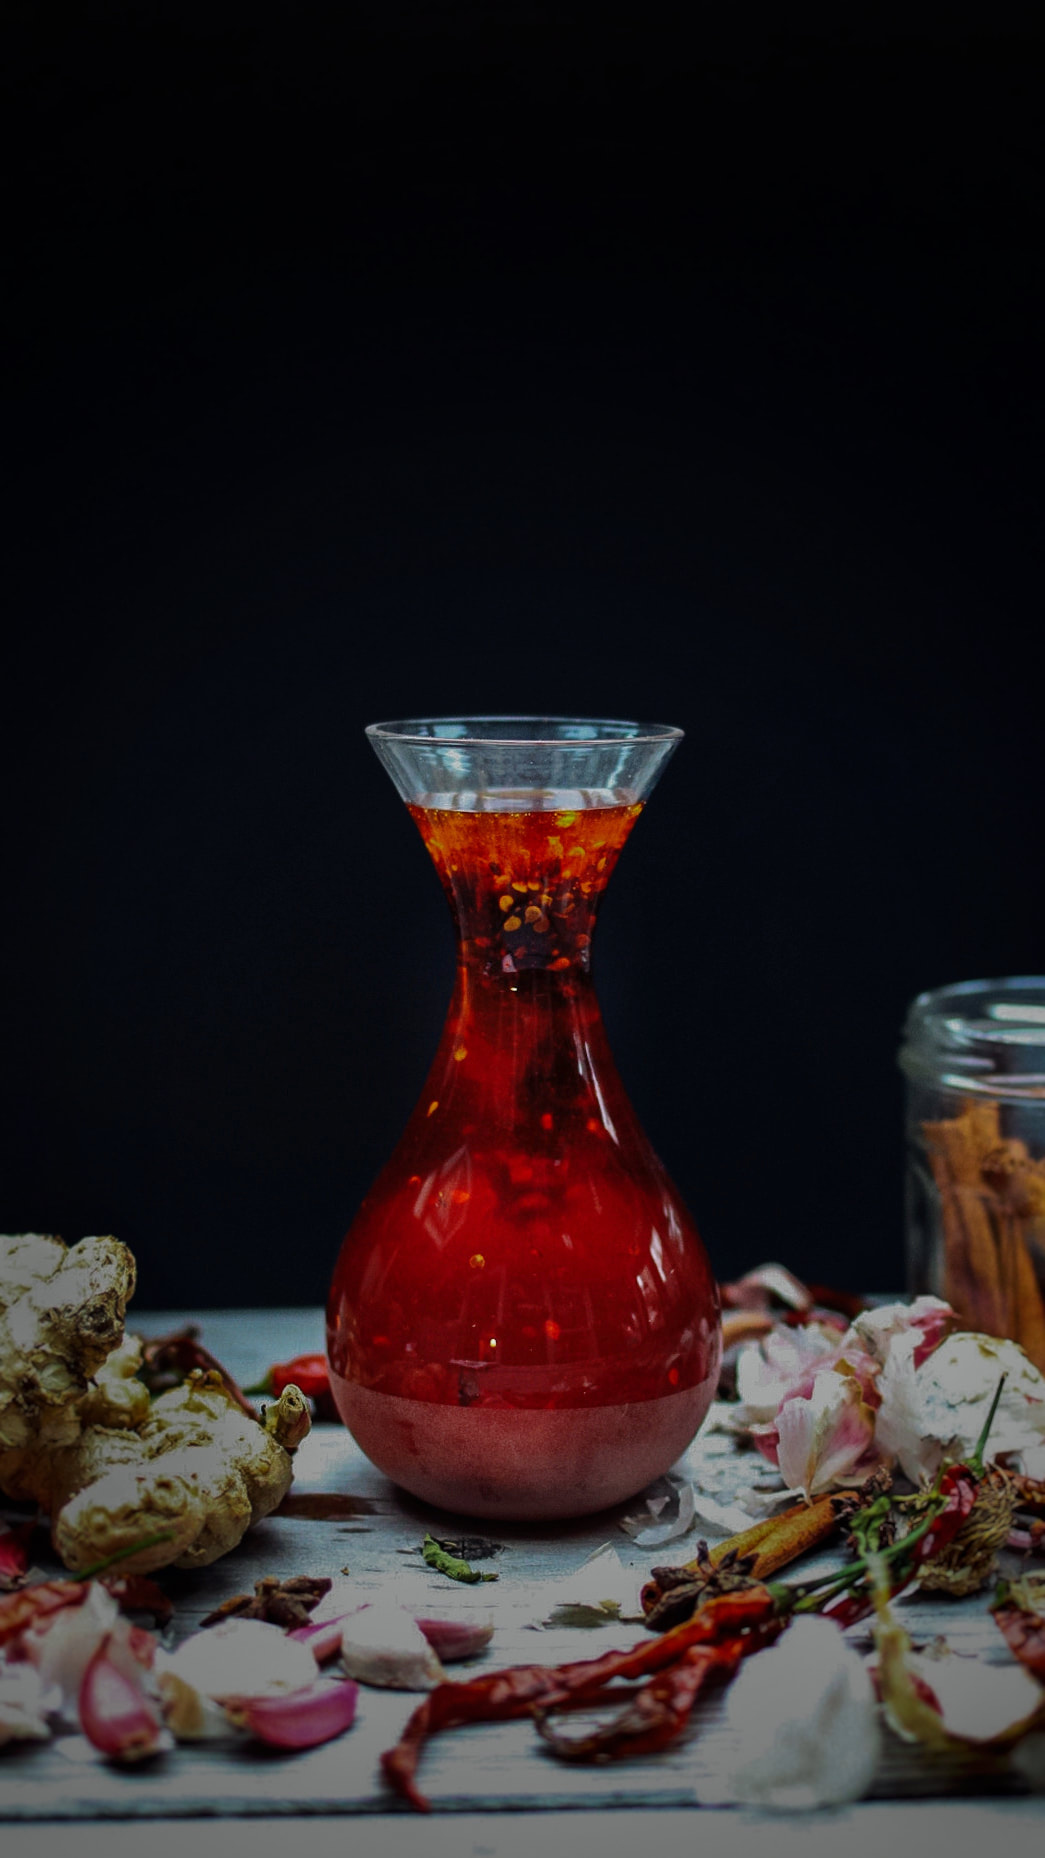 Ingredients for the chili base 3 oz. crushed red pepper/chili flakes 10-12 whole dried chilis, stems removed (thai, birdseye, etc.) 2 teaspoons salt 2 teaspoons sugar 1 teaspoons white pepper, ground 5 tablespoons olive oil 2 tablespoons smoked paprika, ground (for color) Ingredients for the oil infusion 20 oz. olive oil (I used extra virgin) 4" knob of fresh ginger, peeled and sliced into 1" chunks 20 cloves of garlic, smashed and peeled, whole 5 shallots, peeled and sliced in half 10 star anise, rinsed with water 5 cinnamon sticks, rinsed with water Directions Mix all of the ingredients for the chili base in a large heat-safe bowl or container. Set aside. Next, we'll start the oil infusion. Pour the 20 ounces of olive oil in a large saucepot over medium high heat. Allow to heat until it reaches roughly 225 degrees Fahrenheit. If you don't have a thermometer, allow to heat for about five to ten minutes. Drop a small scrap of shallot into the oil. If it simmers with small bubbles, it's ready. If it deep fries with large bubbles and seems intense, turn down the heat. Make sure to remove your tester shallot slice. Once the oil is hot, add the sliced ginger. Allow to fry for only 15 seconds. Remove the ginger with a strainer and set aside. It should not be blackened, just slightly browned. It's important to not burn the ingredients that are infusing the oil. Next add the garlic. Fry for 20 seconds. Remove and set aside. Next add the shallot. Allow to cook for 30 seconds. Remove and set aside. The star anise should have been rinsed under water to keep from scorching during cooking, as should have the cinnamon sticks. Add the moistened star anise to the oil. Allow to cook for 2.5 minutes. Remove the anise and set aside. Lastly add the cinnamon sticks. Allow to cook for 90 seconds. Remove the cinnamon and set aside. Turn off the heat and allow the infused oil to cool slightly. The solids from infusing the oil (the ginger, garlic, shallot, etc.) may be discarded or composted. After allowing the infused oil to cool for about 5 minutes, pour a small amount from the sauce pot into the heat safe container holding the chili base. We want the oil to heat the chili base gradually--not all at once or we risk cooking the ingredients! I usually start by pouring in about a 1/2 cup. Over the next few minutes, slowly add the infused oil about 1/2 to one cup at a time until all of the infused oil resides in the heat safe container. The chili oil is now prepared! Allow to fully cool before handling, eating, or storing in air tight containers. Infused oil can be stored in the refrigerator to prolong shelf life. I personally keep mine on the counter as we go through it quickly! Just remember chilled oil can solidify so be sure to set out to warm up for a while before use. 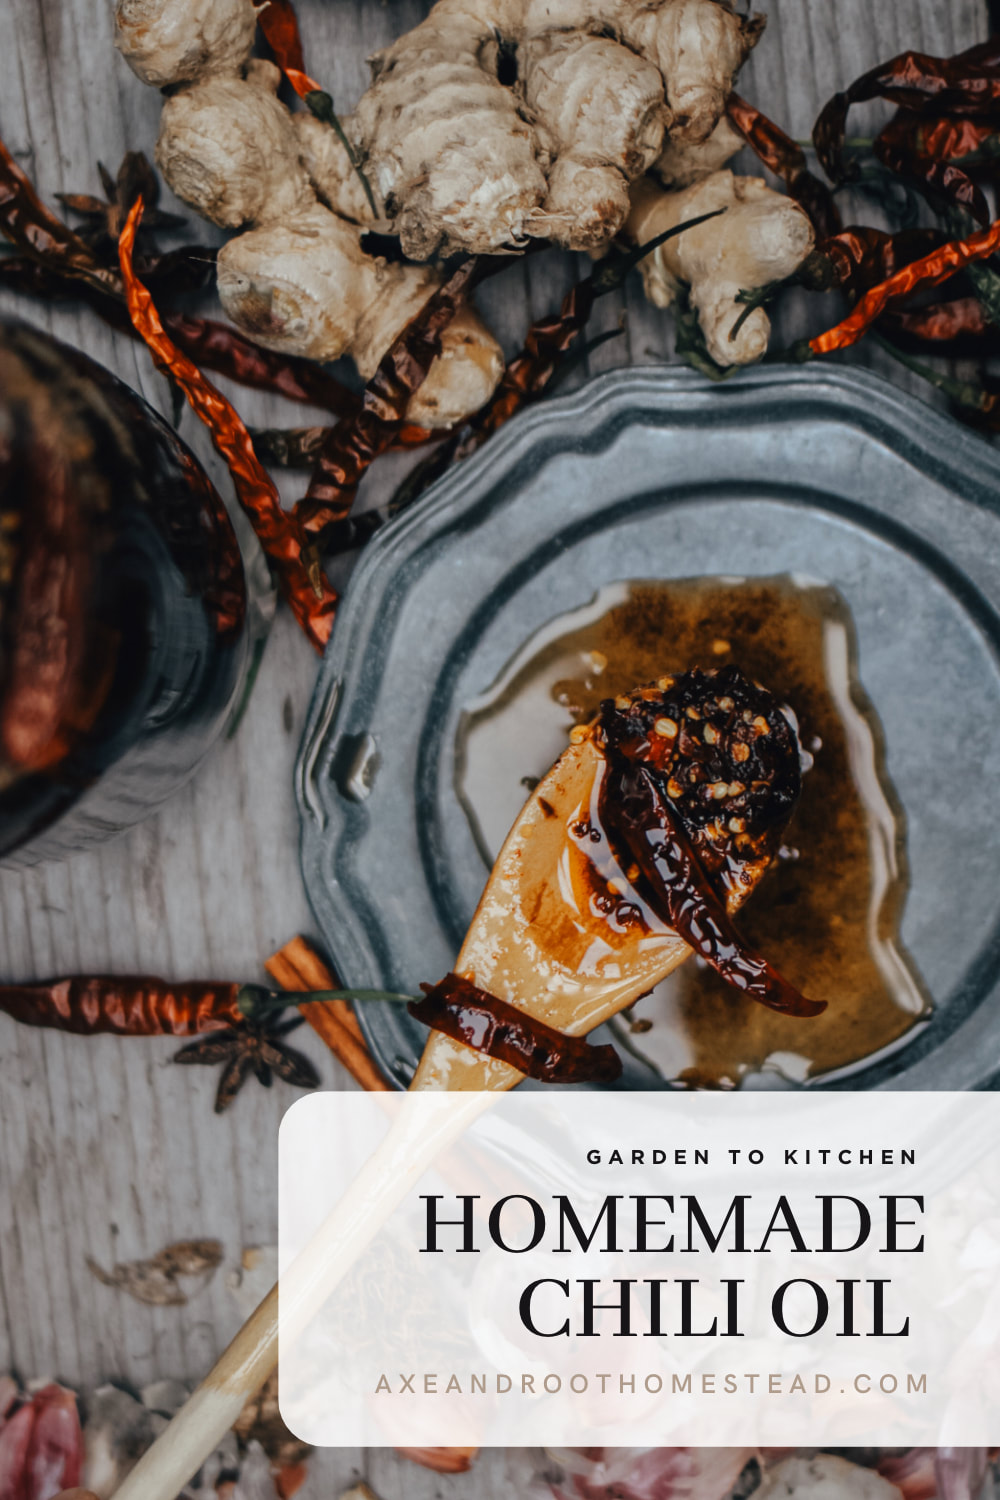 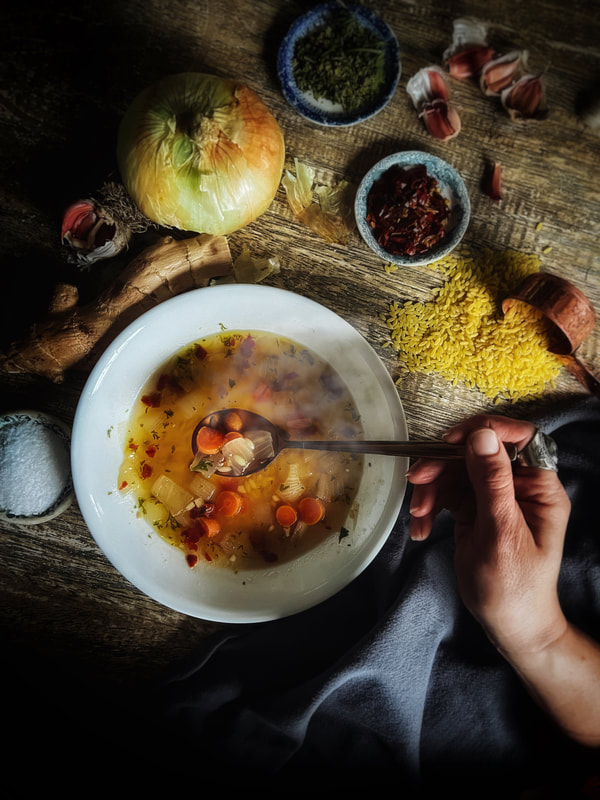 If fire cider was a soup. This is the wicked spicy version of Italian penicillin soup (aka pastina) I make when feeling sick. I take the age old pastina soup remedy up several notches by adding extra garlic, fresh ginger, hot chilis, lemon juice, and black pepper. Plus I add reishi mushroom powder to offer the body extra support (it’s an adaptogen). When I get a bowl of this into my system 2-3x a day when sick, nasty bugs head for the hills fast. Unlike traditional pastina where a portion of the soup is blended and then returned to the stockpot as a thickener, there's no blending here. When I'm not feeling 100%, I want a quick one-pot meal with as little prep as possible. Ingredients 1 tablespoon olive oil 1 medium white onion, chopped 1 heaping tablespoon garlic, minced crushed red pepper to taste (I use about two teaspoons) 1 tablespoon fresh ginger, minced 2 large carrots, washed and sliced or diced 4 cups vegetable broth 3 cups water 1/3 cup pastina or orzo salt and pepper to taste 1 tablespoon dried oregano or parsley 1 teaspoon reishi mushroom powder juice of 1 lemon Directions Add olive oil to a large stock pot over medium high heat. Add the onion and soften, about 4-5 minutes. Add the garlic, crushed red pepper flakes, and ginger, and stir. Allow to cook until fragrant, about one minute. Add the sliced carrots and cook one minute more. Pour in the vegetable stock and water. Bring to a boil. Once the water begins to boil, stir in the orzo or pastina and add the salt, pepper, and parsley or oregano. Stir. Reduce to a simmer and allow to cook for 10 minutes. Turn off the heat and add the reishi mushroom powder along with the lemon juice. Serve warm. Any leftovers can be stored in the refrigerator in an airtight container and reheated as individual servings. Here's why I've included what I've added to the classic Italian penicillin recipe:
Permaculture Tip: I use homegrown ingredients for this soup and make my own vegetable stock. Crops that are deemed too small or imperfect are great for drying or freezing, and then using in soups and homemade broths later on, all winter long. And, yes, I even grow my own ginger. Homegrown ginger does well in a sunny windowsill for those of us in cold climates. *Panossian, Alexander and Wikman, George (2010) Effects of Adaptogens on the Central Nervous System and the Molecular Mechanisms Associated with Their Stress—Protective Activity. Pharmaceuticals (Basel) 3(1): 188–224.  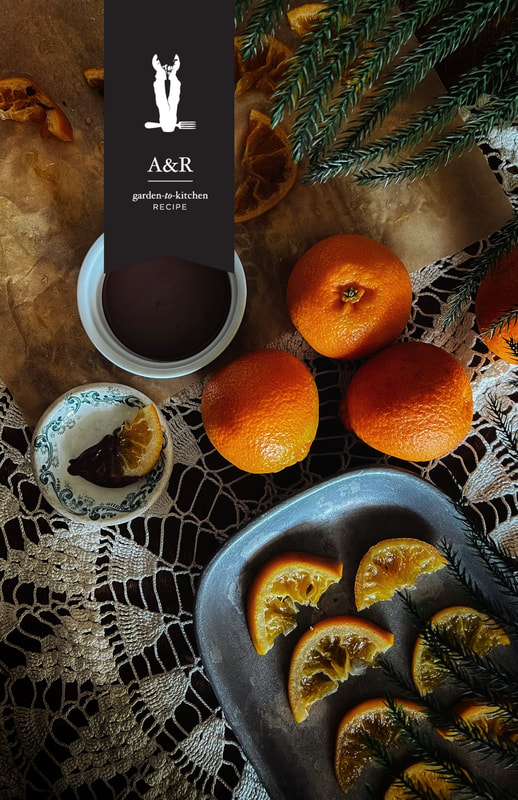 Honey sweetened/candied oranges are a healthier holiday sweet! I have such a sweet tooth and it’s so hard to not indulge in EVERY cookie I meet this time of year. So to keep in consistency with my passion for seasonal eating, I started making these honey orange slices. Someday, I’ll be making these from 100% homegrown citrus! For now I mix homegrown and store bought fruit with honey from my own hives. You can also dip these in dark chocolate for an added festive touch! Ingredients 12oz raw honey 12oz water 4 navel or Cara cara oranges, sliced Optional melted dark chocolate Directions Combine honey and water for a 1:1 syrup in a sauce pot. Bring to a boil and whisk to dissolve honey. Add orange slices and reduce to a simmer. Simmer, without stirring, for 45 minutes. Using tongs, place slices on a parchment paper lined baking sheet. Make sure they are not overlapping or touching. Chill in the refrigerator for 2 hours to set. Then either eat as is or dip in melted chocolate! 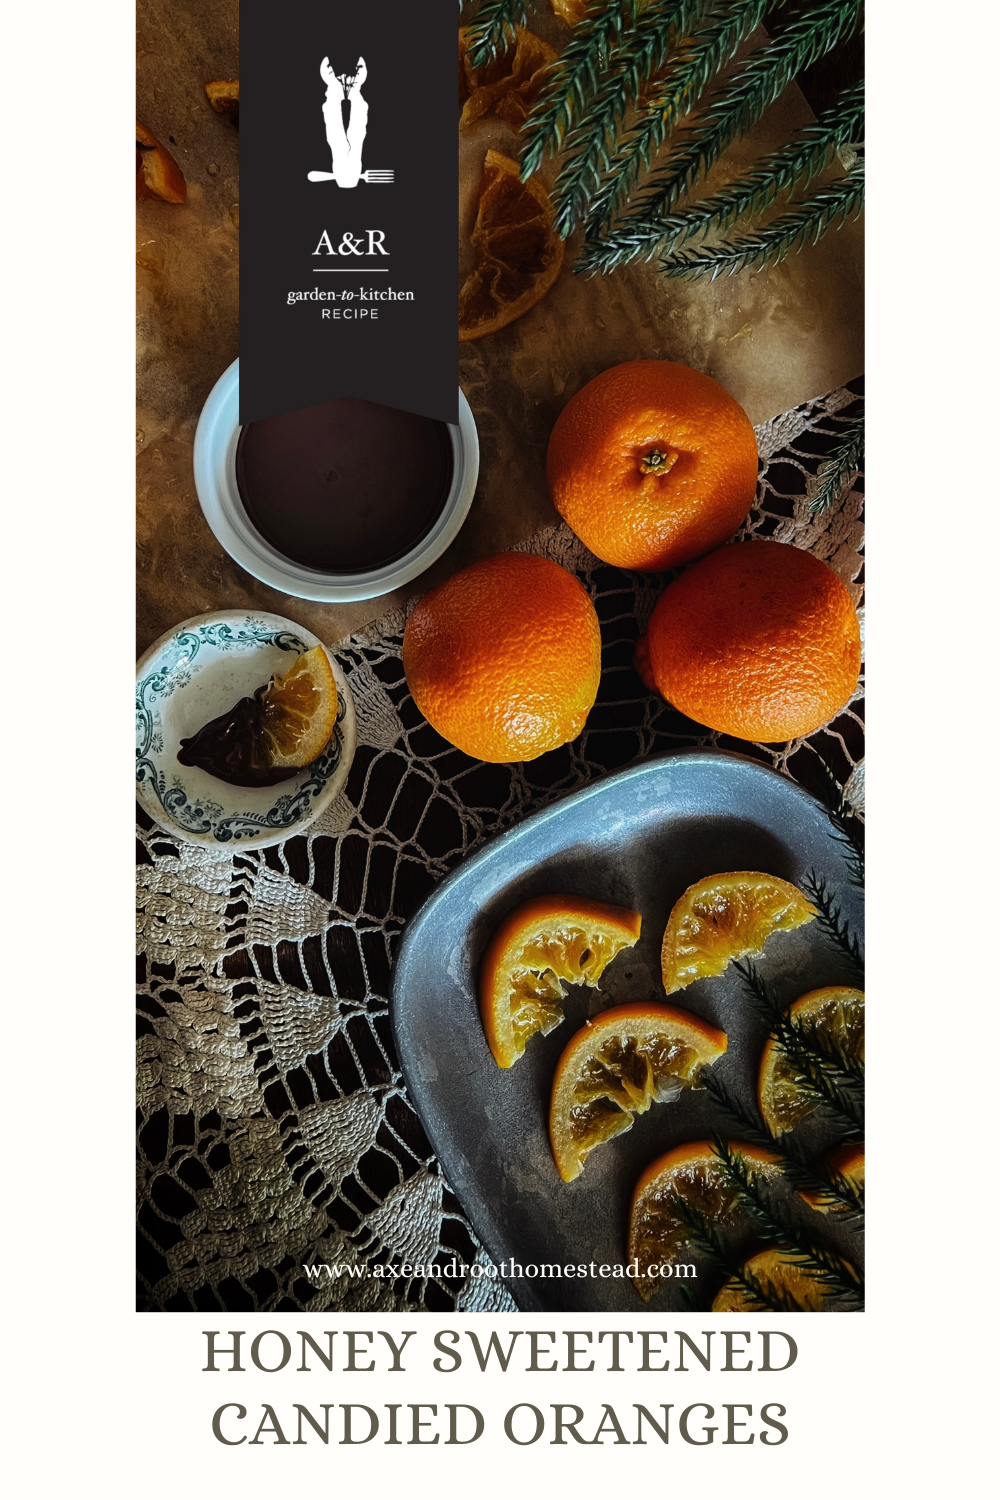
Beans are a low acid food. Therefore, they require pressure canning and not water bath canning. Low acid foods like beans must be heated to an extremely high temperature that is not possible to reach in a water bath method. This high temperature is what makes the beans shelf stable.
Homegrown (or store bought) black beans are easy to make, and very high in nutrients. For reference I can 32 pint jars from 5 pounds of dry black beans.
Directions Soak black beans in a large pot or bowl of water so that they are submerged by at least 1 inch. Soak for 12 to 24 hours before you intend to can. I use the cold pack method, which means after the beans have finished soaking, I drain them, rinse them and then spoon them directly into clean and sterilized mason jars. I leave 1/2 inch headspace and then pour non-chlorinated water over the beans so that they are submerged within the mason jars. Leave 1/4 inch head space. Carefully wipe clean the rims of the jars and add a new lid and affix with a ring. Screw to finger tight. I do not add salt to the beans. Load the pressure canner with the jarred beans according to your pressure canner guidelines. In addition to the water at the bottom of the pressure canner pot, I add 1 tablespoon of distilled white vinegar to keep the outsides of the jars from calcifying. Close the pressure canner, turn on the burner, and bring to a boil so that the pressure begins to rise. Close the steam valve according to your pressure canner guidelines and process the jars at 10 pounds of pressure for 75 minutes. After 75 minutes turn off the burner. Once the steam is no longer rising from the steam valve remove the 10 pounds of pressure setting to allow steam valve to fully open and for remaining steam to fully escape. Once there is no more steam escaping from the fully opened steam valve, remove the lid while standing back and using oven mits. Caution—steam is extremely hot. Allow jars to cool within the pot. Carefully remove the jars once cooled, one at a time, and place on top of a dish towel on the counter. Check that all of the lids are properly sealed by placing one finger in the center of the lid of each jar and then pressing down. If it fluctuates, then the jar was not properly sealed and can be re-processed. If the jar lid does not fluctuate, a proper seal has been made, and they may be stored out of sunlight, in a dark and cool location, such as a pantry or a cupboard. 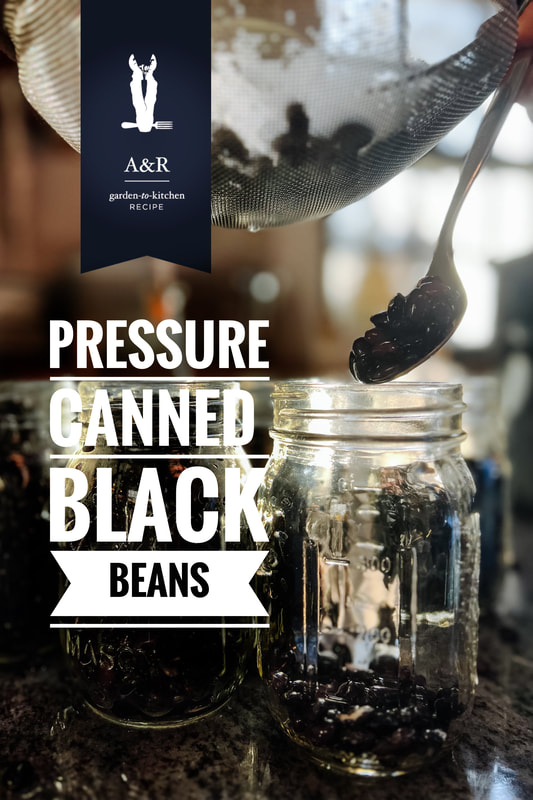
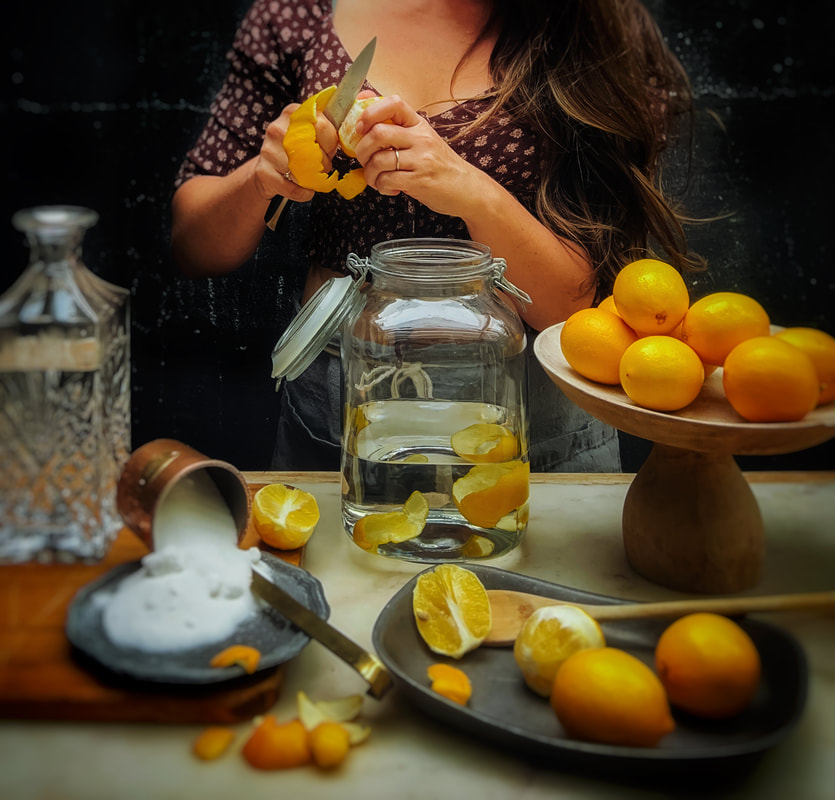 It’s citrus season! I started a new batch of homemade limoncello! Have you ever tried it or made your own? It’s so easy and ions better than store bought. Limoncello is a sweet and tart liquor sipped after a meal in Italian culture. Because it contains so much lemon oil from the rinds, it truly does help with digestion. Careful… it’s easy to over-sip. 😉 The yellow color of the liquor comes from the lemons, but you could also use orange peel for a Halloween-themed drink! Recipe below: Limoncello Recipe 1 bottle 190 Proof Grain Alcohol (I use Everclear but vodka works too) 10 meyer lemons, organic 2 cups water 2 cups sugar or more to taste Directions Wash the lemons. Carefully peel the skin from each lemon using a vegetable peeler or pairing knife. Try to get only the yellow skin; the white pith adds a more bitter flavor. Place the skins in a large glass bottle. Pour grain alcohol over the top and close the jar. Allow to infuse for two weeks, undisturbed, out of direct sunlight. After two weeks, strain the alcohol into a new container and discard the rinds. They’ll be crispy! Prepare a simple syrup in a large sauce pot over medium heat by combining equal parts water and sugar. Whisk and allow the sugar to dissolve. Turn off the heat. Add the lemon liquor to the sauce pot and whisk to combine well. Taste the limoncello. If more sweetness is needed, mix a second batch of sugar syrup in a second sauce pot. Slowly add to the limoncello (1/2 cup at a time so as not to over sweeten). Once the limoncello is fully cooled, pour into glass bottles using a funnel. Screw the lid on the jars and store in the refrigerator for up to one month or the freezer for one year. To drink, simply pour liquor in a shot glass and sip after a meal. 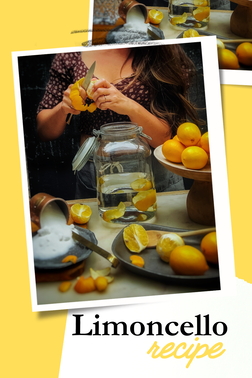 |
Angela is the farmer and content creator behind Axe & Root Homestead® LLC. This historic six-acre permaculture farm is home to two Clydesdale horses, ten honeybee hives, five sheep, two guardian dogs, barn cats and a flock of 40 geese and ducks. The farm produces maple syrup, fruit from a small orchard and loads of garden produce for consumption, preservation and donation to the local food pantry.
The Sustainable Homestead is available NOW!
Categories
All
|

