|
Here's the thing about dill pickles... They can be canned with lots of room for creativity so long as the vinegar to water ratios remain the same. The vinegar is the ingredient that contributes acid to the recipe which is an essential component of safe water bath canning. Water bath canning is the best method for dill pickles for long term shelf storage; while you absolutely could pressure can, the result would be a mushy spear as a result of the high heat. A crunchy spear can still be hard to produce in water bath canning because, after all, we are cooking the spear in boiling water. While some folks like to add pickling granules (calcium chloride) to their canning jars to help maintain a crispy pickle, I go the natural route with grape leaves. Grape leaves contain tannins that naturally contribute to a crisp pickle and we have plenty on-hand from our hobby vineyard. One grape leaf at the bottom of the jar is all that's needed to help keep your pickles crunchy. 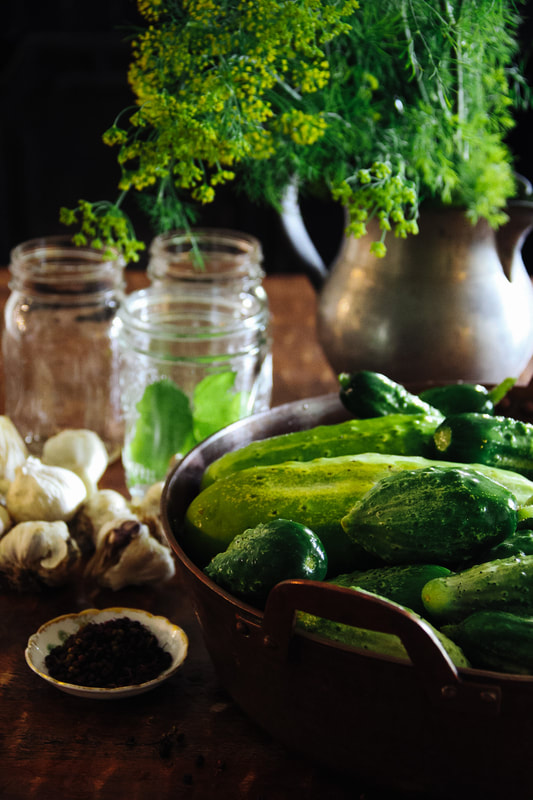 ANGELA'S KOSHER DILL PICKLE RECIPEYields 4 pint jars Ingredients 2.5 pounds pickling cucumbers (fresh, washed and free of blemishes) 2.5 cups non-chlorinated water 2.5 cups distilled white vinegar 1/4 cup + 1 teaspoon kosher salt 4 garlic cloves, peeled 4 grape leaves, washed and free of blemishes 12 fresh dill sprigs 2 teaspoons yellow mustard seed, whole 24 black peppercorns Directions Wash the cucumbers. Cut 1/4" off of the blossom end. Quarter or slice the cucumbers in half, lengthwise. Trim to fit the height of the jar while allowing 1/2" headspace. Combine water, vinegar, and kosher salt in a saucepan over medium heat. Bring to a boil and stir to dissolve the salt. Remove from heat. Sterilize the canning jars and prep the lids and rings. Start a large stockpot or canning pot of water on the stove. Bring to a boil. While the water is heating, begin to fill the jars. Place one grape leaf, three sprigs of dill, one garlic clove, 1/2 teaspoon mustard seed, and six peppercorns in each jar. Pack tightly with sliced cucumbers. Repeat until all jars are packed. 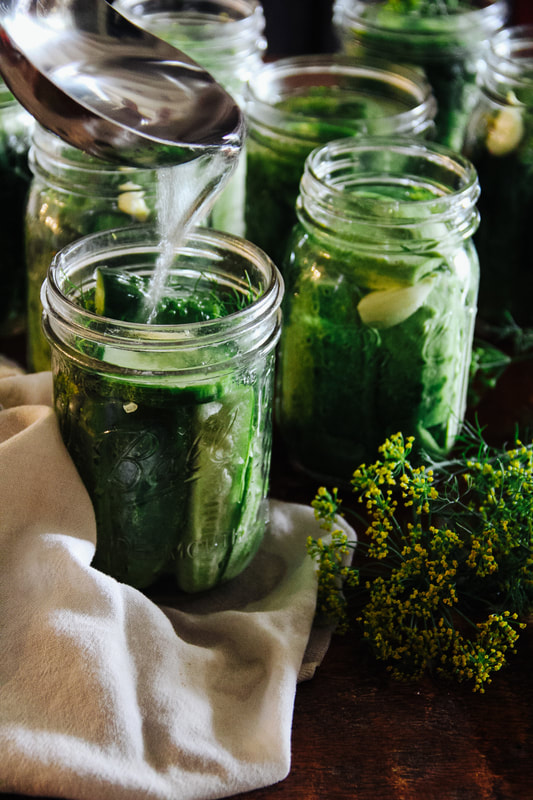 Pour the vinegar, water and salt brine into each jar, covering the contents. Leave 1/2" of headspace at the top of each jar. Remove air bubbles by running a clean butter knife around the inner perimeter of the jar. Wipe the rim of each jar clean with a dry towel. Add the lid and rim and tighten.
Submerge the jars in the boiling water bath and process for 15 minutes, adjusting for your altitude as needed. You can find altitude adjustments on Ball canning's website. After 15 minutes remove the jars from the water bath and set aside on a folded dish towel on the countertop. Allow to cool. Lids will pop as they seal. After the jars have fully cooled, check the center of each jar lid by pressing with your finger. If the lid fluctuates, reprocess for another 15 minutes. If the lid is firm, the seal is successful. Store in a cool, dark place. Pickles should be consumed within one year. 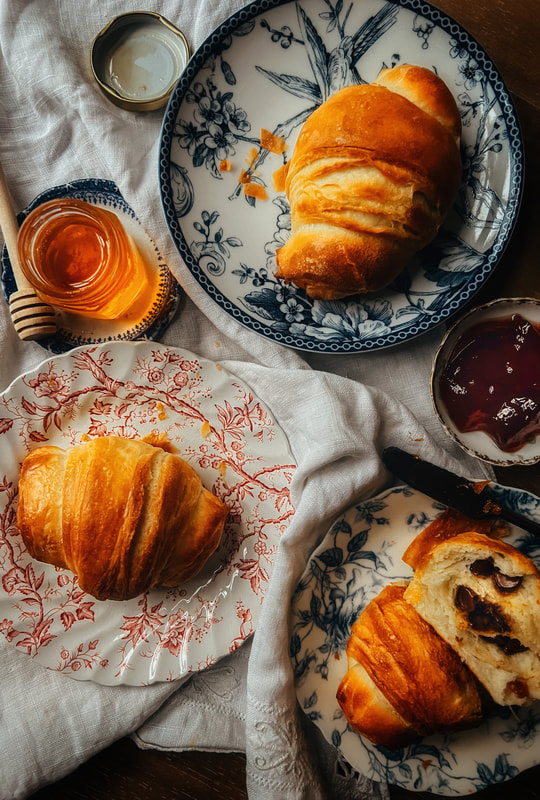 Here's the thing. Croissants are a waiting game. They're not hard to bake, they're just time consuming. But the from-scratch version is loads better than the kind you can buy pre-made in a tube and whack on the countertop to open. These croissants are flaky on the outside, and chewy on the inside. While they may not be perfect French pastries, they are certainly good enough for a homemade breakfast on a weekend morning. Recipe is for 8 butter croissants and 8 chocolate croissants. If you don't need 16 croissants, cut the recipe in half. The proportions still work just fine. Croissant Ingredients 1 teaspoon active dry yeast 320g warm water 440g pastry flour* 220g all purpose flour 60g sugar 400g butter, softened (plant-based or dairy) Dark chocolate chips (for chocolate croissants) Plant-Based Egg Wash Ingredients 1 tablespoon maple syrup 1/8 cup coconut or almond milk Standard Egg Wash Ingredients 1 tablespoon water 1 egg Directions 1. Combine water and sugar in the bowl of a stand mixer with a dough hook attachment. Whisk for a moment. Then sprinkle yeast on top. Whisk to mix slightly. Allow to rest to activate the yeast for five minutes. 2. Add flours to mixing bowl, 1 cup at a time, mixing between. There should be no dry dough. Next add 20g of softened butter. Mix. Cover and let rise 1.5-2 hours. 3. Remove dough and slice into 24 equal pieces. A kitchen scale is helpful here. Melt the butter in a microwave or over the stove top in a bowl and set aside. I use a pasta machine lasagna noodle attachment for the next step. You may also use a rolling pin on a lightly floured work surface. 4. Roll one piece of dough very thinly into a 10x20" (approximate) rectangle. Carefully move to a piece of parchment paper. This is the base layer. Brush the dough from edge to edge with the melted butter. Repeat this step, rolling out each slice of dough and applying butter between until you have stacked 12 sheets. Do not brush butter on the top of the last sheet. 5. Repeat step four with the remaining 12 pieces of dough. This will create our second stack of croissants. Cover with a dish towel and allow all croissants to rise for 2 hours. 6. Roll each stack of dough into 12x24" rectangle. We are working to remove some of the air. Next make three horizontal cuts along the shorter width of the rectangle. We should have four sections in each stack. 7. Slice each of the four rectangle sections once in a horizontal line across the middle. We now have 8 triangles per stack.  8. Line a baking sheet with parchment paper.
FOR BUTTER CROISSANTS: To roll the croissants start by taking one triangle. Start at the wide end and tightly roll towards the slender point. Tuck the point underneath the croissant and set croissant, point side down, on the baking sheet. Repeat for all triangles. FOR CHOCOLATE CROISSANTS: To roll the croissants start by taking one triangle. Place chocolate chips along the body of the triangle. I use about 10-12 chips per croissant. You can also melt the chocolate chips and brush onto the triangles before rolling. Start at the wide end and tightly roll towards the slender point. Tuck the point underneath the croissant and set croissant, point side down, on the baking sheet. Repeat for all triangles. 9. Cover the freshly rolled croissants with a towel and allow to rise 1.5 hours. You may also pause here and place the croissants in the refrigerator, allowing them to slow their rise and chill overnight. Cover with plastic wrap and chill for up to 12 hours if desired. 10. Heat the oven to 425 degrees Fahrenheit. Create the egg wash by combining the plant-based ingredients in a small bowl (or the standard egg wash ingredients in a small bowl). Whisk to combine the wash ingredients. Gently brush the egg wash on top of each of the croissants. Bake for ten minutes. Lower the oven to 375 degrees Fahrenheit. Cook for 8 minutes more. 11. Remove the croissants when they are golden brown. Allow to cool for 10 minutes before serving. To store the croissants, wrap in an airtight container and keep in the refrigerator. Stores for 24 hours. If you wish to store the croissants longer, freezing is recommended. *If pastry flour isn't available, you may substitute all purpose flour for this amount. Note that the texture of the pastry will be less flaky, and more dense... but still delicious. 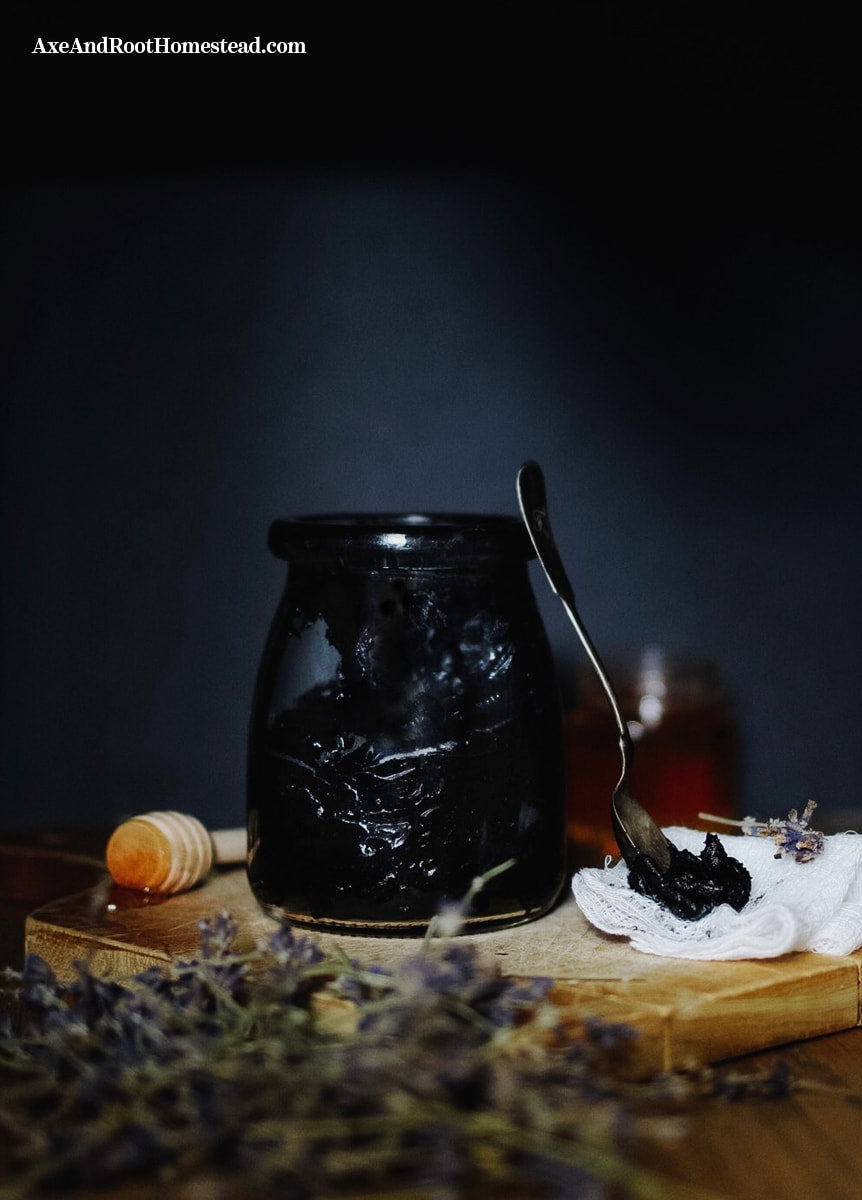 Ducks, like any other living creature on the homestead, get hurt. I've built up quite the arsenal of first aid supplies over the years after dealing with all kinds of gnarly situations. Right alongside conventional medicinals, I also keep homemade balms and salves. This is a topical recipe I created as an all purpose wound application. I use it on poultry (both chickens and geese) and even on myself at times. And it smells like lavender! It is safe for horses also. Black Wound Salve for Backyard Poultry Ingredients 1/2 cup unrefined coconut oil, melted 1 tablespoon beeswax pellets, melted 2 teaspoons raw honey 2 tablespoons activated charcoal 2 tablespoons bentonite clay 20 drops lavender essential oil Directions Combine all ingredients in a heat-safe bowl. Stir until fully combined. Pour the mixture into salve containers such as a mason jar with a wide mouth. The salve will solidify as it cools. Allow to cool fully before securing the lid. To use, simply scoop a small amount of the salve onto your fingers. Gently rub the salve onto the wound of the bird. Covering with a clean bandage is best to avoid melting salve during the warmer months. Repeat as needed. Discontinue use if irritation or reaction occurs. 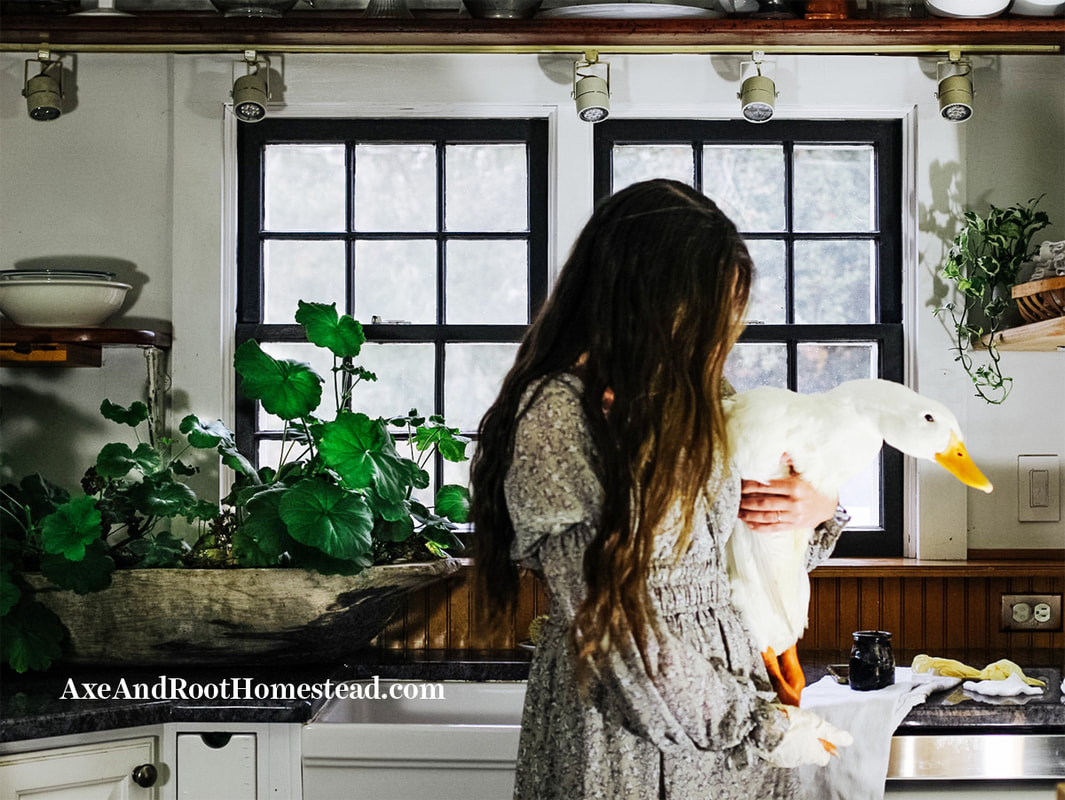 Why these ingredients?
Coconut Oil Moisturizes skin, creates a protective barrier against bacteria, reduces inflammation Beeswax Reduces inflammation, fights infection, heals wounds (anti-bacterial and -viral) Raw Honey Contains antibacterial, anti-inflammatory, antioxidant, antiviral and antifungal Activated Charcoal Draws out bacteria and impurities Bentonite Clay Contains antibacterial and anti-inflammatory properties while absorbing dirt and oil Lavender Essential Oil Calming aromatherapy in addition to anti-inflammatory abilities 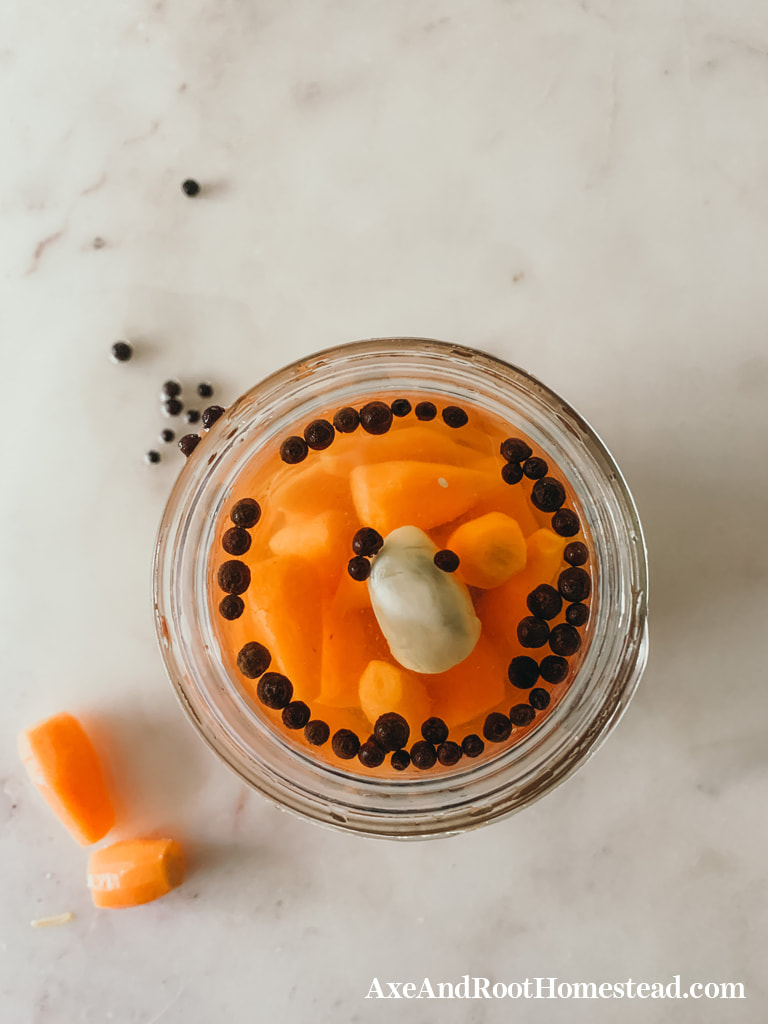 We're a pickle family. We're always trying local deli pickles, homemade pickle recipes and sharing fermented pickle tips with friends. Then I heard about Carrot Pickles and was so excited to give them a try; we had just harvested a large bushel of carrots from the garden. These are so tasty even my kids love them.
Ingredients 1 tsp. black peppercorns 1 tsp. whole mustard seeds 1/2 tsp. dried allspice berries 1 c. rice vinegar 1 c. water 1/4 c. granulated sugar 1 tbsp. kosher salt 1 lb. baby carrots, peeled 2 whole cloves garlic, peeled Directions In a small sauce pot over medium heat, combine the peppercorns, mustard seeds, and allspice berries and toast until fragrant, 1 to 2 minutes. Next add vinegar, water, sugar, and salt and raise heat to medium-high and bring to a boil. Once sugar is dissolved, remove from heat. Tightly pack the baby carrots and garlic into two sterilized pint-sized glass jars and pour in brine while hot. Add the lid to the jar, refrigerate, and let sit at least 12 hours before serving. This is not a shelf stable recipe for canning in a water bath or with a pressure cooker. This is a refrigerator pickle recipe only. 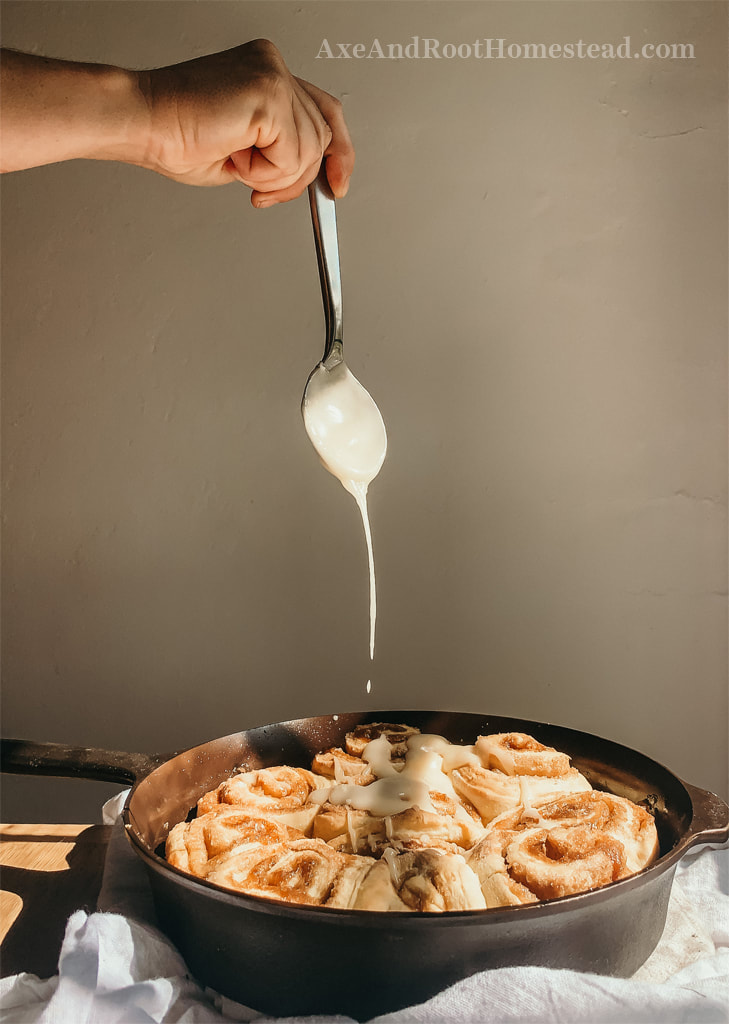 One of my favorite morning rituals is to bake breakfast for my family well before they are awake. I like it even more when most of the work has already been done the night before! These cinnamon rolls are super simple to make and the flavor is amazing with just a hint of lemon. When available, I love to use fresh lemon from our greenhouse lemon trees.
Ingredients For the Dough 1 cup fed sourdough starter 3/4 coconut milk (dairy works too) 1 large egg (or flax egg for vegan) 4 tablespoons butter, melted and cooled (we use vegan butter) 3.25 cups all purpose flour 1/4 cup sugar 1 tablespoon lemon juice For the Filling 3/4 cup brown sugar 1.5 tablespoons cinnamon 2 tablespoons butter, softened (we use vegan butter) 1/8 cup flour For the Icing 1.5 cups powdered sugar 1 tablespoon lemon juice 1/2 tsp vanilla extract 1-2 tablespoons coconut milk (dairy is fine too) Directions Mix all of the dough ingredients together in a large bowl and combine until a sticky dough forms. If using an electric mixer, stir ingredients on medium for about 2 minutes or until well mixed using a dough hook attachment. Let the dough rest for 20 minutes, covered. While dough is resting, make the filling. Roll the dough out onto a lightly floured work surface into a rectangle measuring about 20" long and 12" tall. Spread the filling over the dough in an even layer from edge to edge with the exception of one short side. Leave about 1/2" of space on one short end. Starting with the short end covered with filling, roll the dough jelly-roll style until you have reached the opposite side. Pinch the end to close along the body of the dough. Using a very sharp knife or baker's twine, slice the cinnamon rolls into 10-12 even slices. Place in a greased baking sheet or a greased/well-seasoned cast iron skillet. Cover and allow to rise in the refrigerator over night. In the morning, remove the cinnamon rolls and uncover. Allow to rest while oven heats to 400°F. Bake for 20-25 minutes until edges just begin to turn a dark golden color. Remove from the oven and allow to cool. While the cinnamon rolls are cooling, combine the ingredients for the icing. Start with one tablespoon of milk and add more to thin the icing if needed. Drizzle over cooled cinnamon rolls and serve immediately. Leftovers can be stored in the refrigerator in an air-tight container for one or two days. 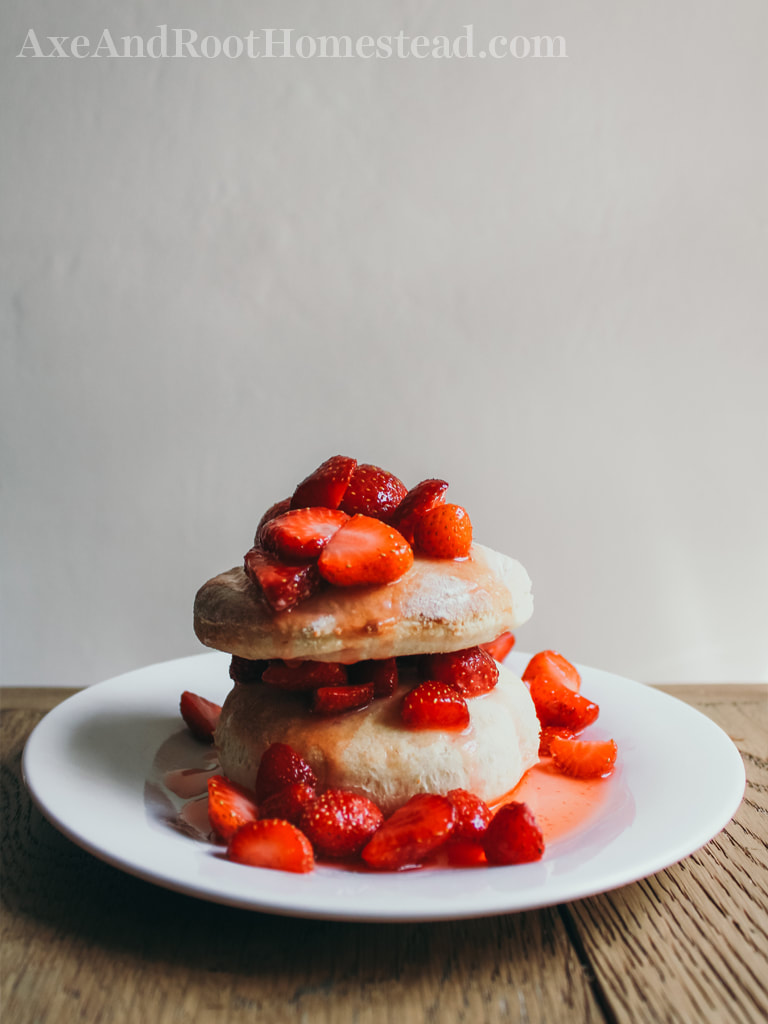 Fresh strawberries don't last very long around here. In my family strawberries are pretty much only fresh eaten; they never make it in the door! But if I can save a few to spare my go-to is this Sourdough Strawberry Shortcake. It's relatively healthy-ish and isn't loaded with processed sugar. Plus it's so refreshing for a summer evening. Ingredients for the Biscuits 2.5 cups all purpose flour 1 tablespoon baking powder 1/2 tsp pink Himalayan salt 1/2 tsp baking soda 6 tablespoons softened butter (we use vegan butter) 1 cup sourdough discard (unfed) 1/4 cup raw honey 1/4 cup milk (we use coconut milk) 1 tablespoon lemon juice Ingredients for the Berries 1 tablespoon lemon juice 4 cups raw strawberries, ends cut and sliced 1/4 cup raw honey Directions for the Biscuits Combine all of the biscuit ingredients into the mixing bowl of an electric mixer fitted with a dough hook. Mix on medium for two to three minutes, until a smooth dough forms. Roll out on a lightly floured surface to 1/4 to 1/2" thick. Using pastry cutters, cut out 2 or 3" circles. Set aside on a parchment lined baking sheet. There should be roughly 12 biscuits. Cover the biscuits with a cloth and allow to rise for two hours. After two hours heat the oven to 425F. Bake for 8-10 minutes just until edges are slightly browned. Remove and allow to cool. Directions for Berries While the biscuits are rising combine the lemon juice, strawberries and honey in a bowl. Toss to coat evenly and allow flavors to meld in the refrigerator until ready to serve. Construction To plate the shortcake start with one biscuit. Spoon on top a generous layer of strawberries. Repeat with another biscuit and another spoonful of berries. Serve as is or garnish with whipped cream or vanilla bean ice cream.  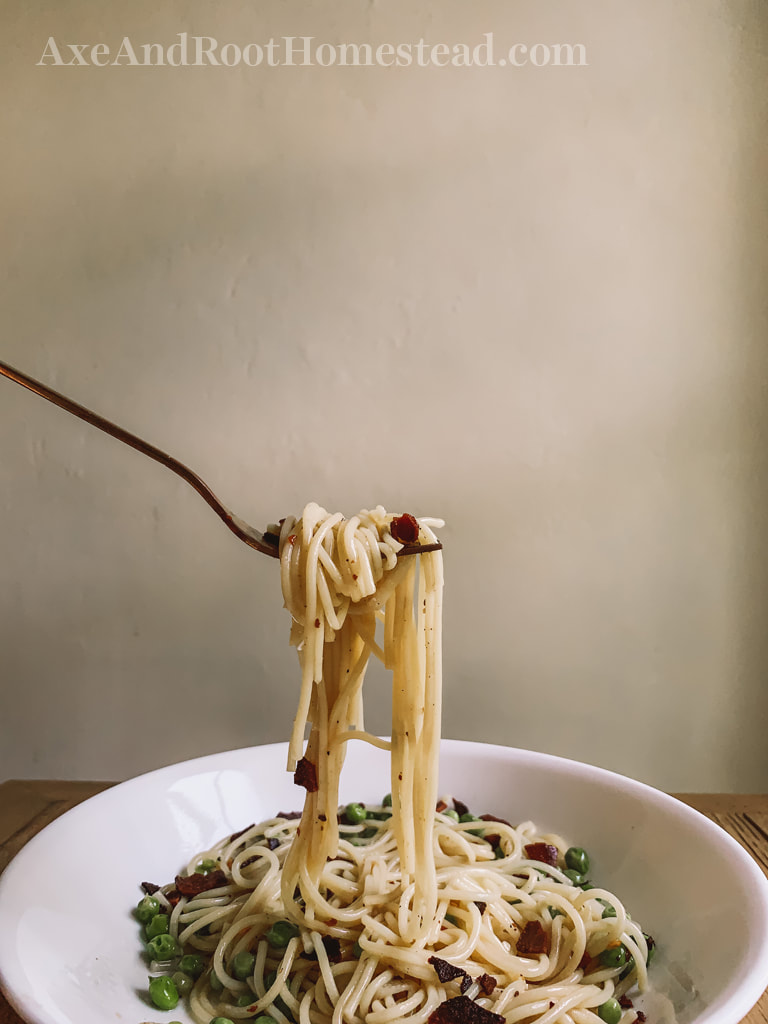 I grew up in an Italian family, practically raised on pasta. My mom cooked different types of spaghetti recipes from different family members plus favorites from family-owned restaurants. I learned, especially after visiting Italy, that the secret to perfect pasta is simple flavors without a lot of fuss. Dishes don't need to take hours; a beautiful pasta meal can be made in 20 minutes or less. This is a spin I created off the classic Aglio e Olio (Garlic and Oil) and is one of our go-to dinners in our household. Ingredients 1-2 Tablespoons olive oil 6 large cloves of garlic, sliced 1 teaspoon or more of crushed red pepper 2/3 cup fresh or thawed frozen peas 1 pound thin spaghetti or angel hair pasta Directions Boil the pasta according to package directions. Reserve one cup of pasta water and set aside. Drain pasta. In a large skillet, drizzle the pan with olive oil and heat to medium high heat. Once the oil is hot add the garlic cloves and crushed red pepper. Do not allow to brown; only cook for about one minute. Add the peas and cook one minute more. Next add the pasta water to the pan and simmer for 4-5 minutes. Lastly, add the drained pasta and toss to coat. Allow to meld in the pan for one or two more minutes. Then remove from heat and serve. Optional Toppings or Garnishes: Bacon (we use veggie bacon), additional crushed red pepper, a slice of lemon or a small sprinkle of Parmesan 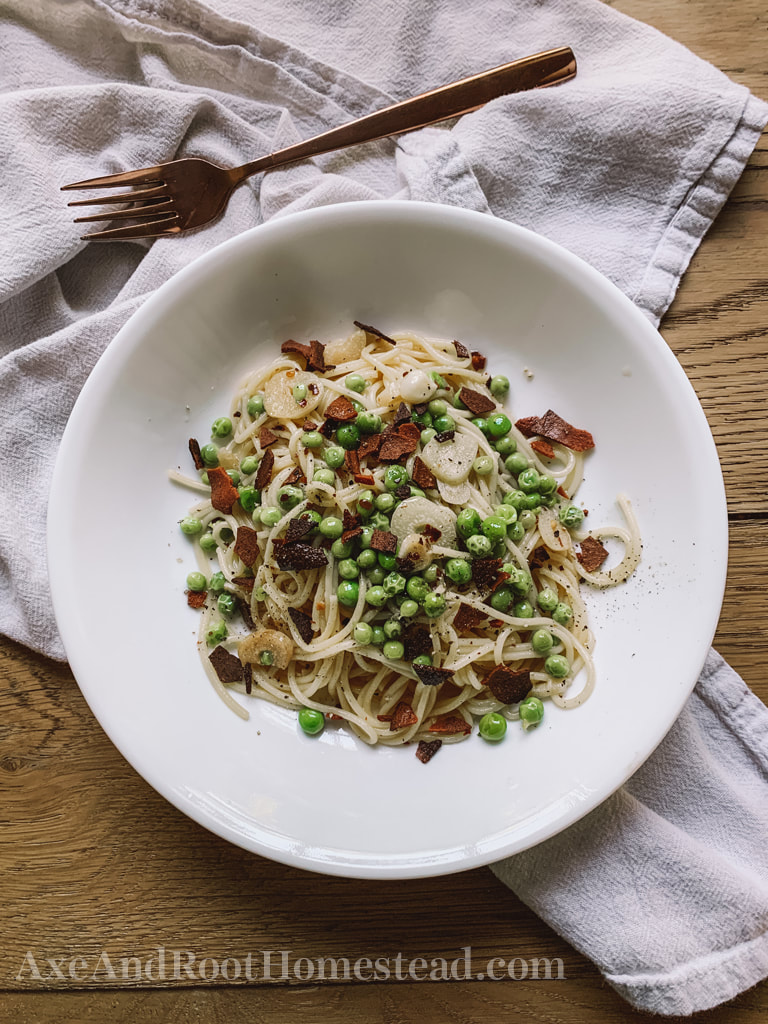 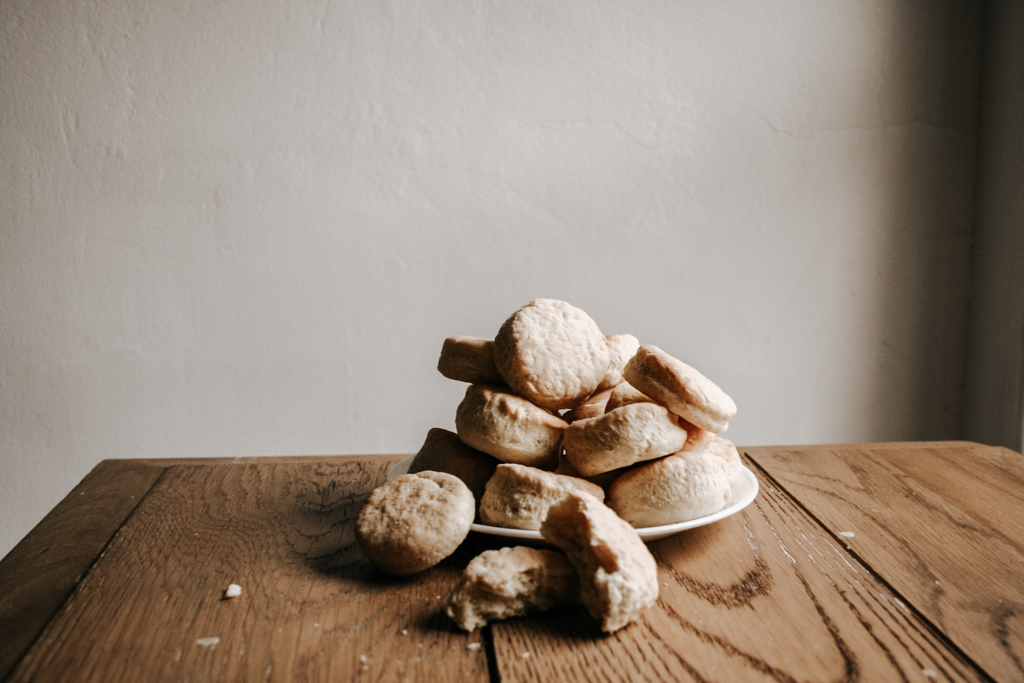 These sourdough biscuits are flavorful, buttery, vegan and perfect for dipping in pot pie or your favorite local honey. They come together easy so long as you have freshly fed sourdough starter on hand.
Ingredients 1 cup flour, sifted 1/3 tsp salt 2 tsp baking powder 6 Tbsp cold vegan butter (regular if you prefer), cubed 1 cup fed sourdough starter Directions Preheat the oven to 425°F. In a mixing bowl combine flour, salt, and baking powder. Stir to combine. Next add cold cubed butter and mix with your fingers to form crumbs. Once a flaky, crumbly consistency is reached add sourdough starter. Mix lightly to incorporate and then turn out onto a lightly floured surface. Knead until all ingredients are well mixed. Roll out to about 3/4” thick and cut into biscuits. Place on parchment lined baking sheet. Reroll scraps and cut again until all of the dough is used. Place baking sheet in heated oven and bake for 12-15 minutes until golden brown. 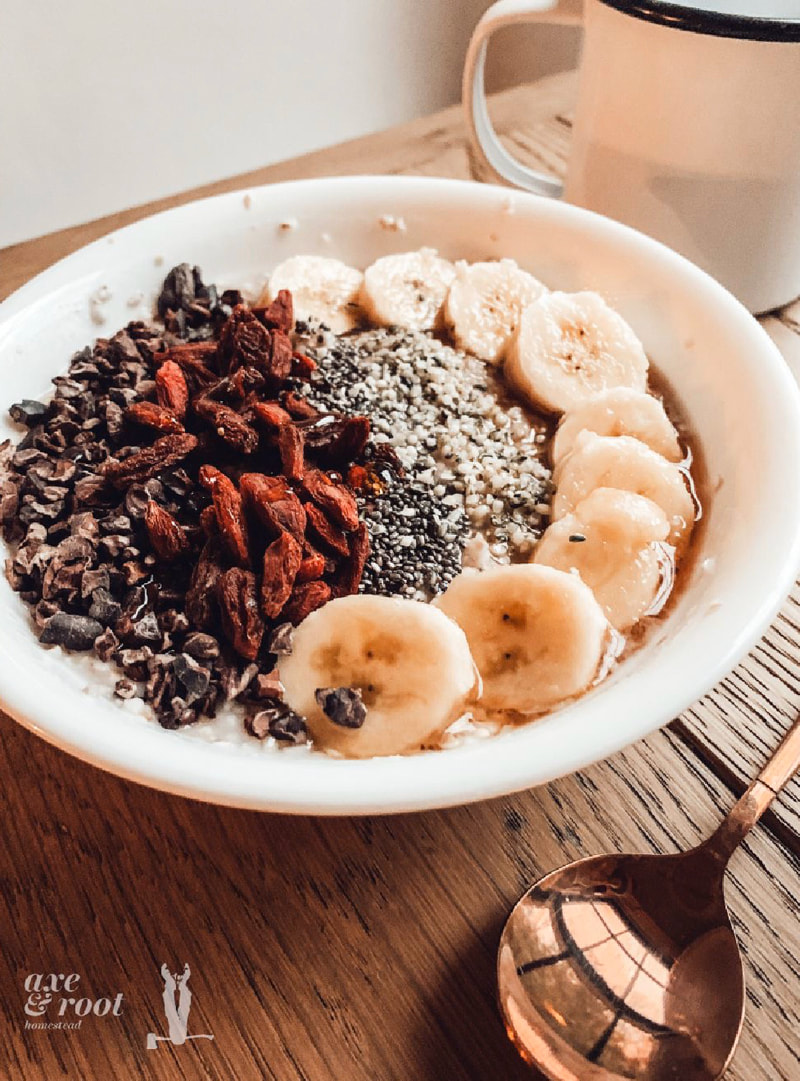 I’m not a big breakfast person. But I have noticed that if/when I don’t eat in the morning, I am much more likely to snack throughout the day, most likely on junk that’s quick and accessible. This breakfast bowl is quick and easy to make, is full of protein to keep me feeling full and loaded with nutrients.
Ingredients 1/2 cup buckwheat cereal groats 1 cup of coconut or nut milk + a splash for later 1 sliced banana 1 Tablespoon cacao nibs 1 Tablespoon goji berries 1 teaspoon of chia seeds 1 teaspoon hemp seeds A drizzle of maple syrup Directions Mix buckwheat groats and milk in a cereal bowl. Microwave for 2.5-3 minutes. Stir and add a splash of coconut or nut milk to thin. Top with remaining ingredients and drizzle with maple syrup. 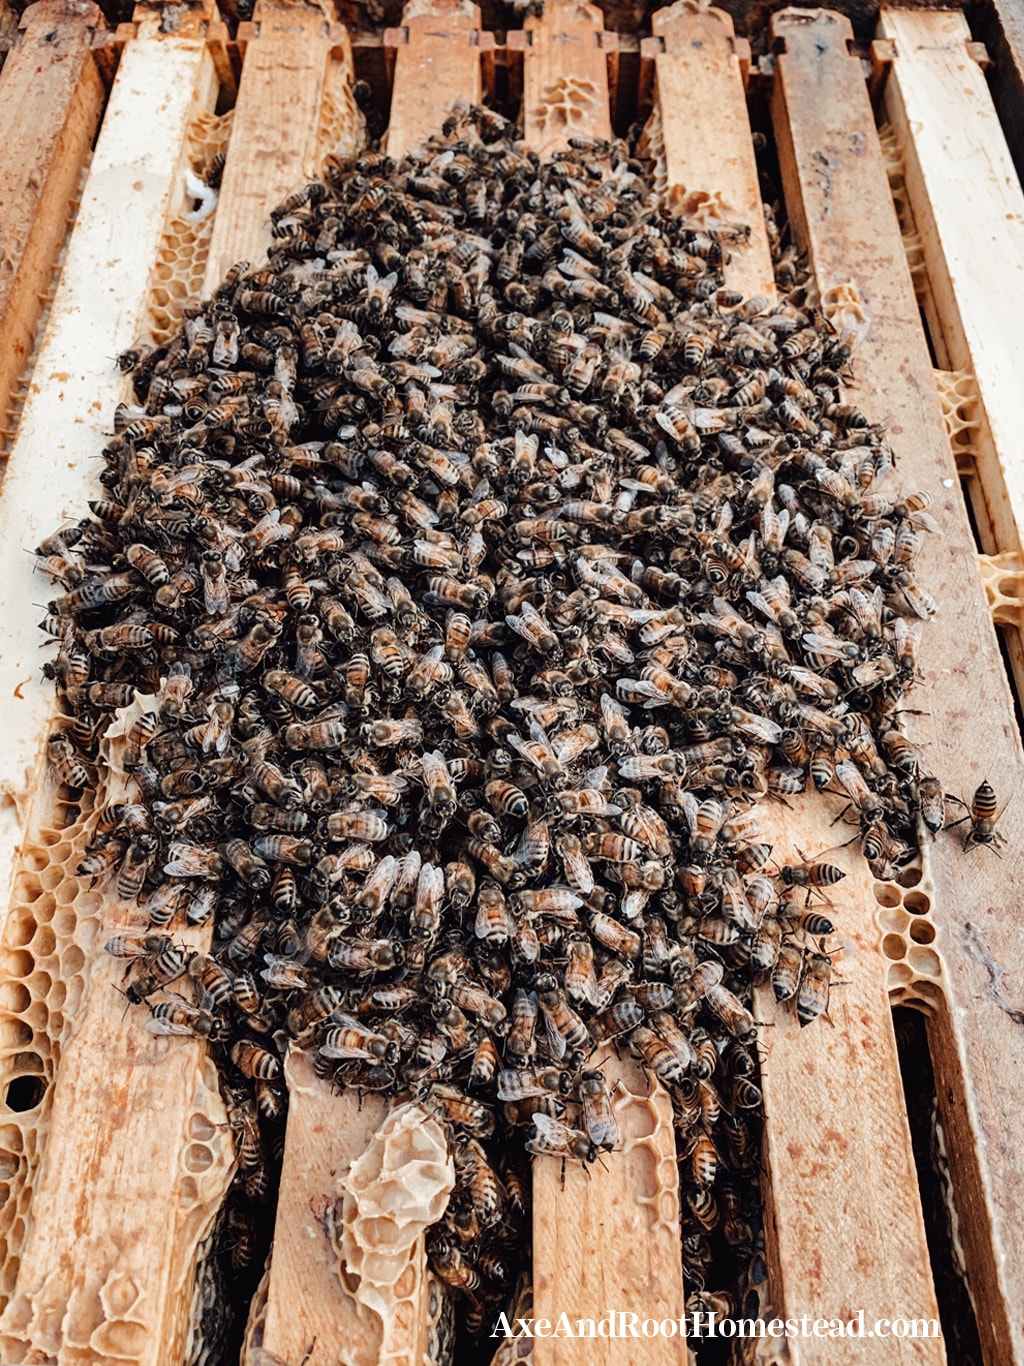 Oxalic acid is a naturally occurring acid within the hive. We can use this acid from common wood bleach, sold at most hardware stores, to create a last varroa mite treatment for the fall before we seal the hives for winter. Keeping our bees varroa free greatly increases their chances of winter survival. When the bees are clustered in their hive in late fall, find a day where the temperatures reach 50ºF or greater. Here in Central New Jersey, we perform our Oxalic Acid Dribble treatment around Thanksgiving.
Ingredients 600mL warm water 35g wood bleach 600g white table sugar (roughly 3 cups) Directions Mix the warm water and wood bleach until the bleach crystals are dissolved. Next add the table sugar and stir until the sugar is dissolved. Test the temperature to ensure it will not scald the bees. To apply to the bees, dribble with a syringe at the rate of 5mL per seam. A seam is the gap or space between the frames within the hive. Do not exceed more than 50mL per colony. Again, ensure the temperature outdoors is around 50ºF. |

So what do you do with all that food you grow? This blog has some ideas.
Categories
All
shop |